From Seed to Smoke: 10 Basic Tips for Growing Your Own at Home
As part of our 500th-issue celebration, we’re answering the single most-asked question from our growers’ mailbag.
Here is the question: Can you please list all of the necessary steps I need to know from seed to harvest? (Asked, in one form or another, more than 680 times since the start of 2017.) Well, the answer usually requires at least a book (or several, depending on how far you want to take it), but we’re going to attempt it here in 10 easy-to-follow steps.
Good luck, everyone… Who knows, maybe you’ll be our next Cannabis Cup champion!
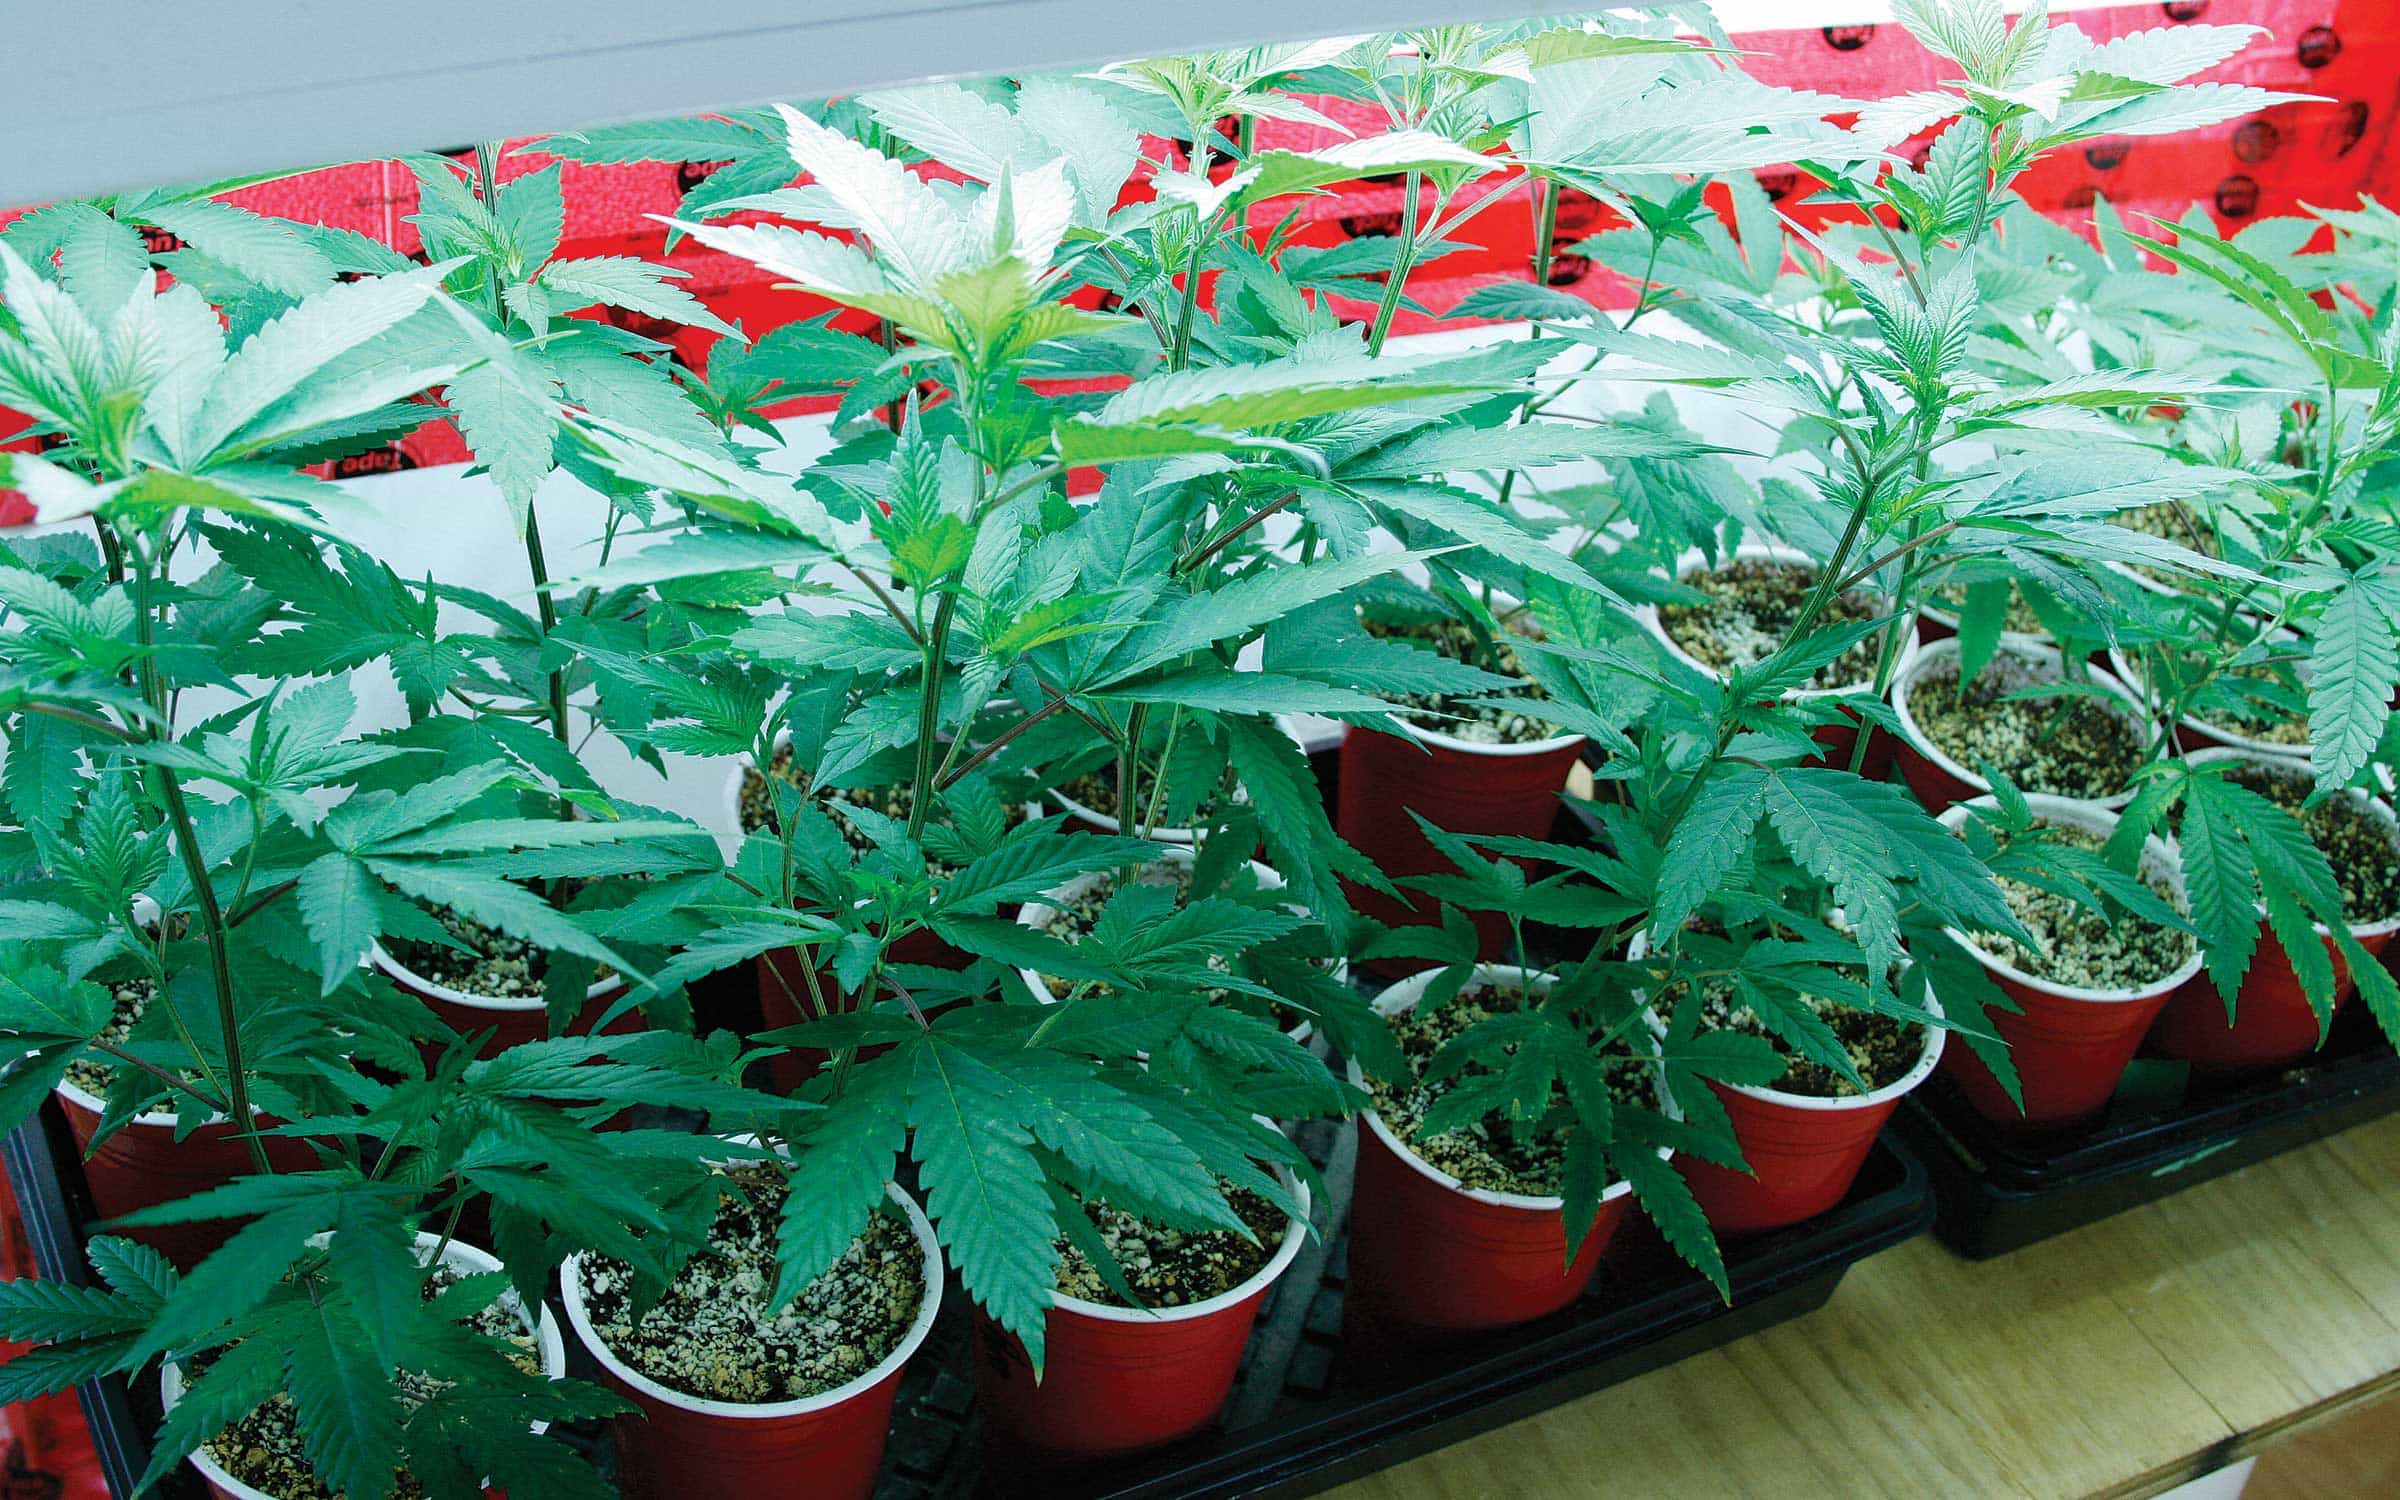
Clones offer uniformity and easy access from local dispensaries. (Photo by Nico Escondido)
Step 1: Get Some Seeds (or Clones)
We start off by answering the second-most-asked question: “Where do I get seeds?” Indeed, in today’s world of feminized seeds and sinsemilla (Spanish for “without seeds”) bud, it’s more difficult than ever to find a few beans in your eighth of weed.
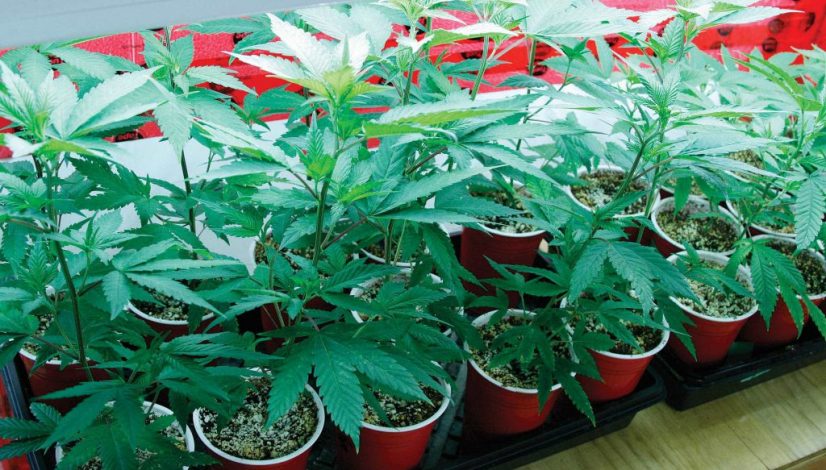
The solution, if you live in a medical or recreational state, is to find a local dispensary that sells clones, check them closely for mites and mold, and away you go. Of course, for more than half of the United States, and in many other narrow-minded countries across the globe, this is simply not a reality. Instead, these folks need to rely on some good old-fashioned rebels, mainly the offshore seeds banks shrewdly located in places where seeds aren’t illegal to possess or sell. Some of these seed banks will ship worldwide—at the buyer’s risk. Still, quite a few of them do manage to get their seed packs through customs to your door with a bit of ingenious packaging. But, as always, the first rule is never to have your seeds shipped to the same address where your garden will be! And the second rule is to read the fine print on these companies’ websites, as many claim that they’ll ship “worldwide,” but then list the countries that they won’t ship to (including the US)—so once you send that money order, you can kiss your allowance goodbye.
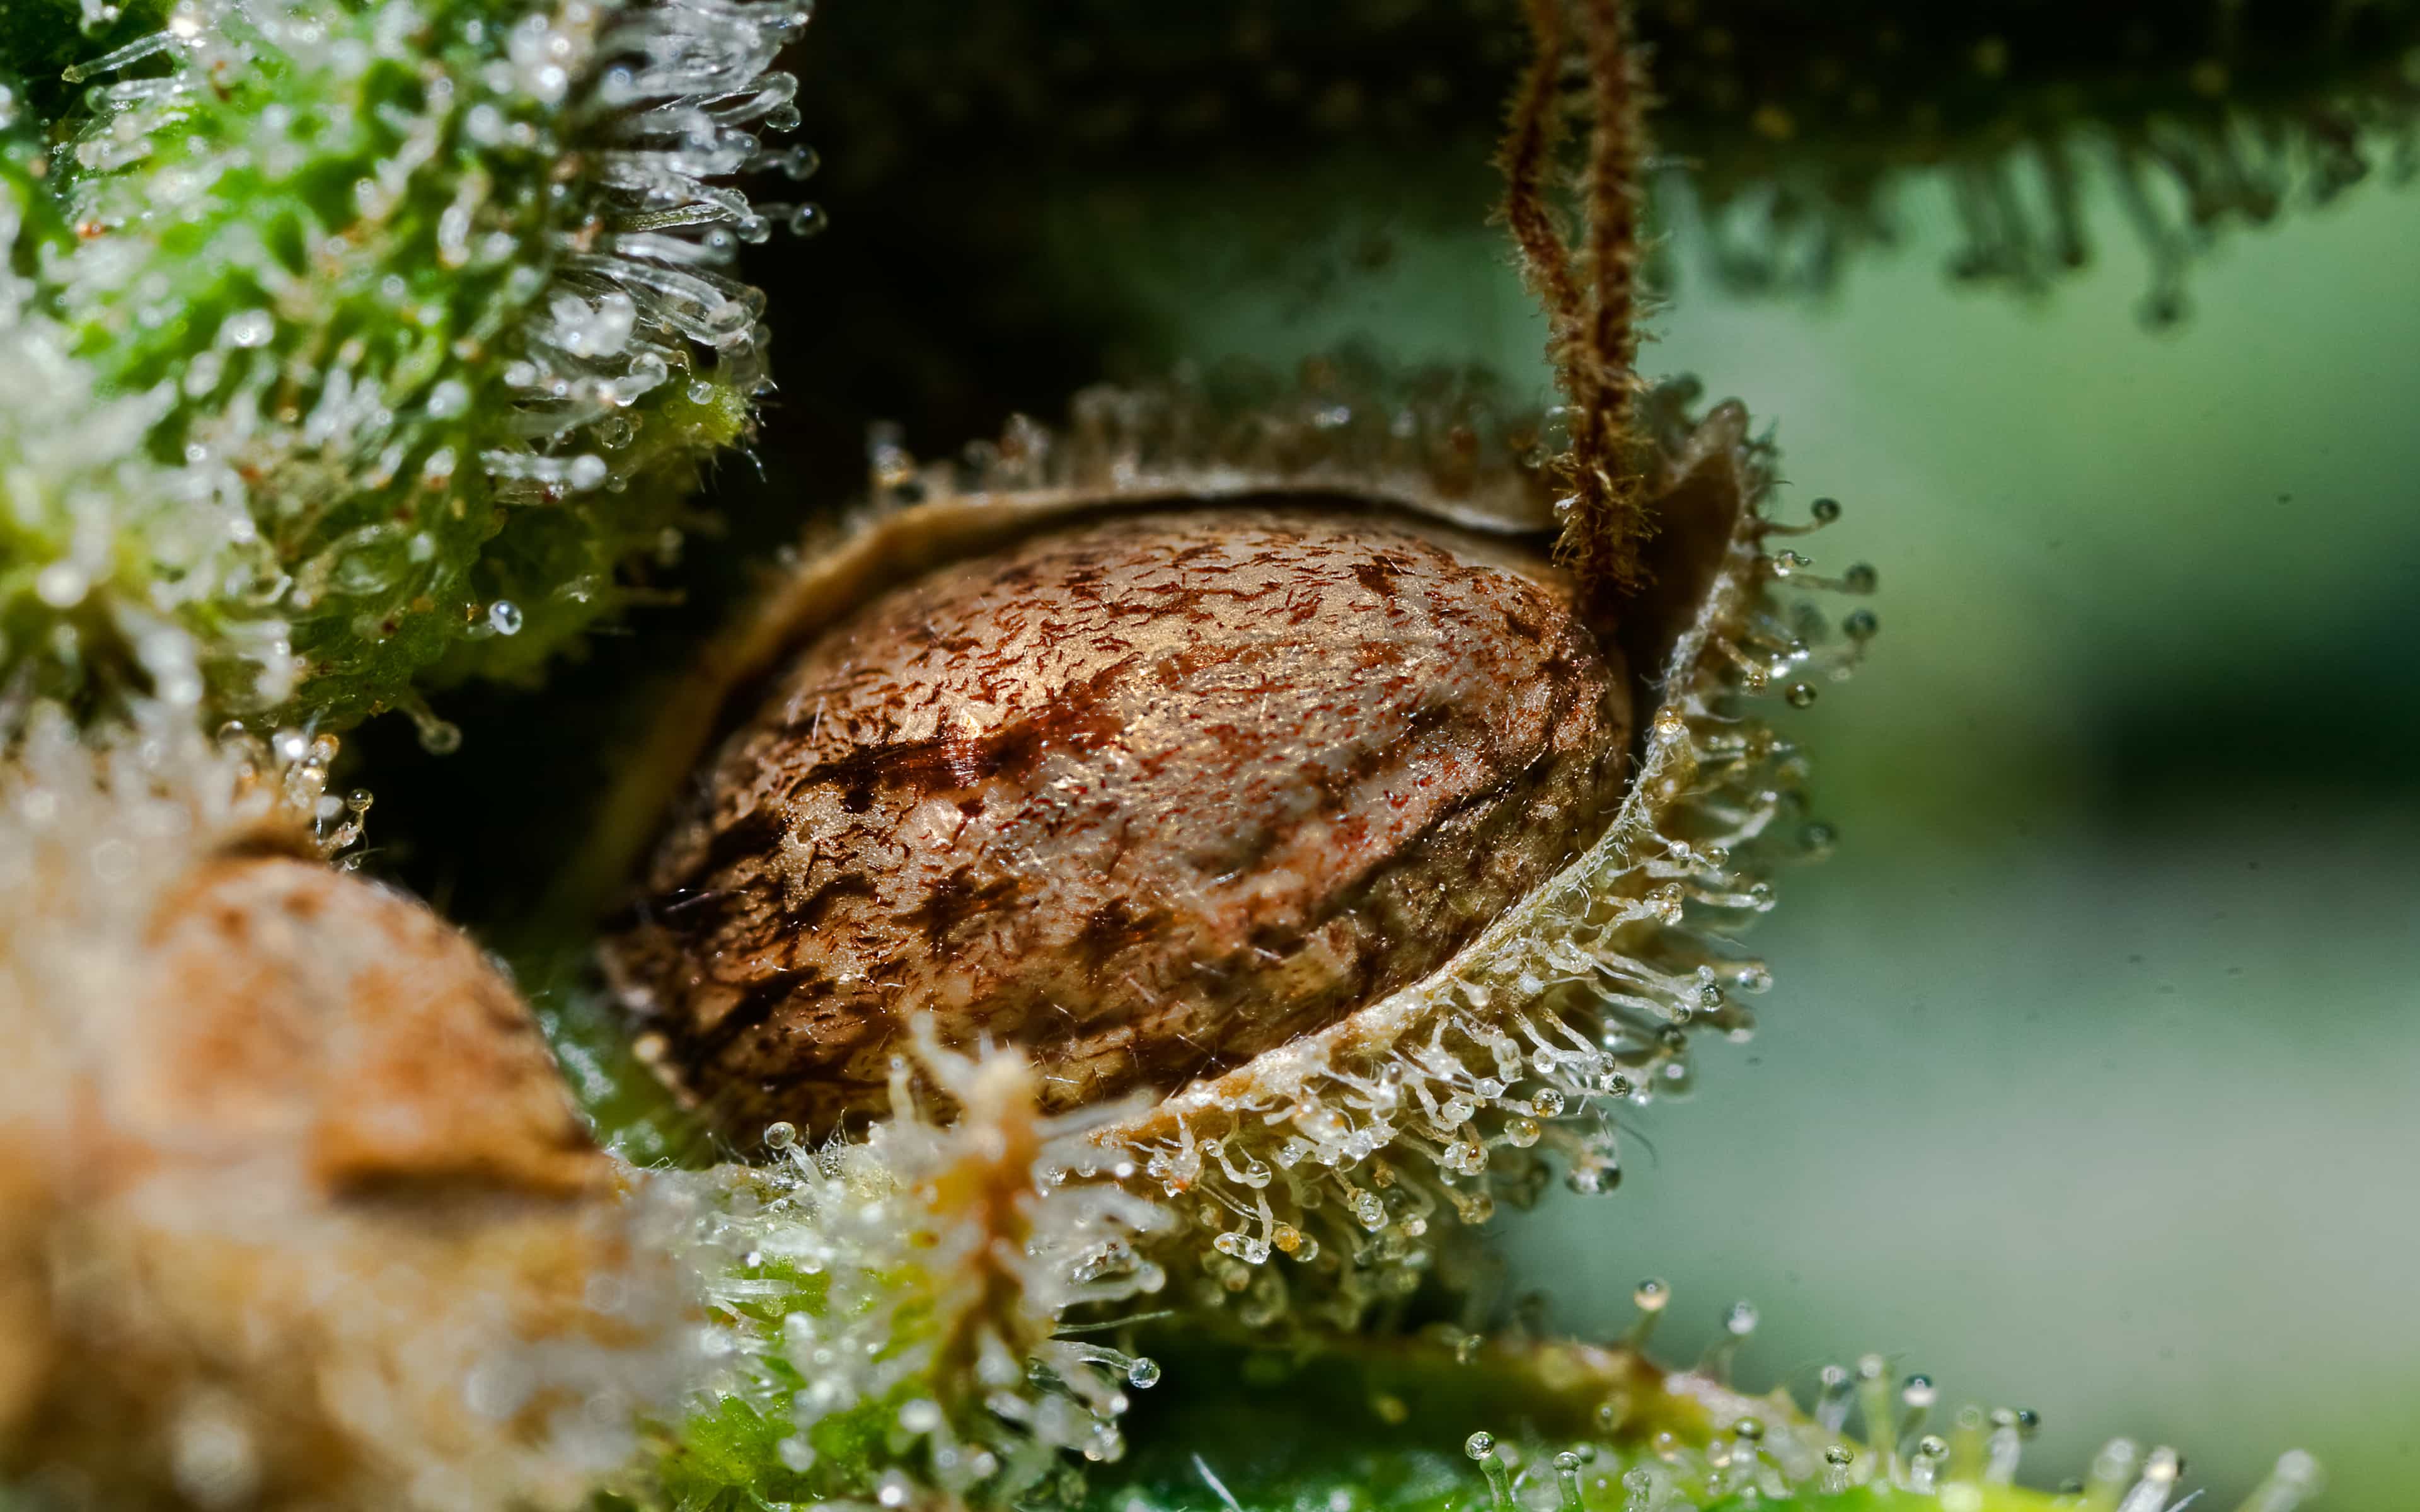
Seeds can be more vigorous in growth, but harder to find—unless they’re in your buds! (Automatic Haze Seed photo courtesy of Dinafem Seeds)
This is definitely one of the harder obstacles to overcome when it comes to growing your own head stash, but you’d be surprised how word of mouth and simply asking around can get you a few gems to sprout at home. However, if you’re feeling bold and want to undertake a seed-bank adventure, you might check out the following sites: bcbuddepot.com; dinafem.org; bigbuddhaseeds.com; and cannabis-seeds-bank.co.uk.
Step 2: Choose Your Space and Your Light
Whether you’re planning to grow indoors or out, finding a smart and secure space is critical to the success of your garden. The most important aspects to consider are its dimensions (especially height), security and, of course, light.
Outdoor growers should make sure that the area they choose is a large, secluded clearing free of shrubs, brush and overhanging trees that can shade out a garden. Southern-facing clearings are usually the best option in North America, as they enjoy the most sunlight during daytime hours. It’s also important to keep in mind that while a plot may appear clear in the early spring, a host of weeds, shrubbery and tree branches may be present by midsummer. Thus, clearing the ground of all vegetative matter and trimming back nearby tree branches (or, even better, not having any trees nearby at all) is imperative.
Indoor growers will want to consider the overall height of their garden space, taking into account the fact that a lamp will likely hang approximately 2 feet below the ceiling and plants should only grow to within 18 inches of the light, thereby eliminating at least 3.5 feet from the overall height of the space. This is one of several reasons why attics often prove to be inadequate as grow spaces—not to mention that heat rises in homes, which usually makes an attic space too hot for an indoor garden.
Basements, empty garages and spare bedrooms often provide the best spaces for home grows. When you factor in the newest all-in-one solutions for indoor gardens, such as grow tents, grow cabinets, or plug-and-play hydroponic systems, the solution to the puzzle quickly takes shape. Indoor tents are probably the most popular option for home growers these days, as they usually come in package deals that also include garden pots, medium, nutrients, fans, filters and lighting, thereby offering beginner growers a turn-key operation right out of the box. More experienced growers can simply buy the grow tent in almost any size footprint they want and then build and customize the garden to their own specifications.
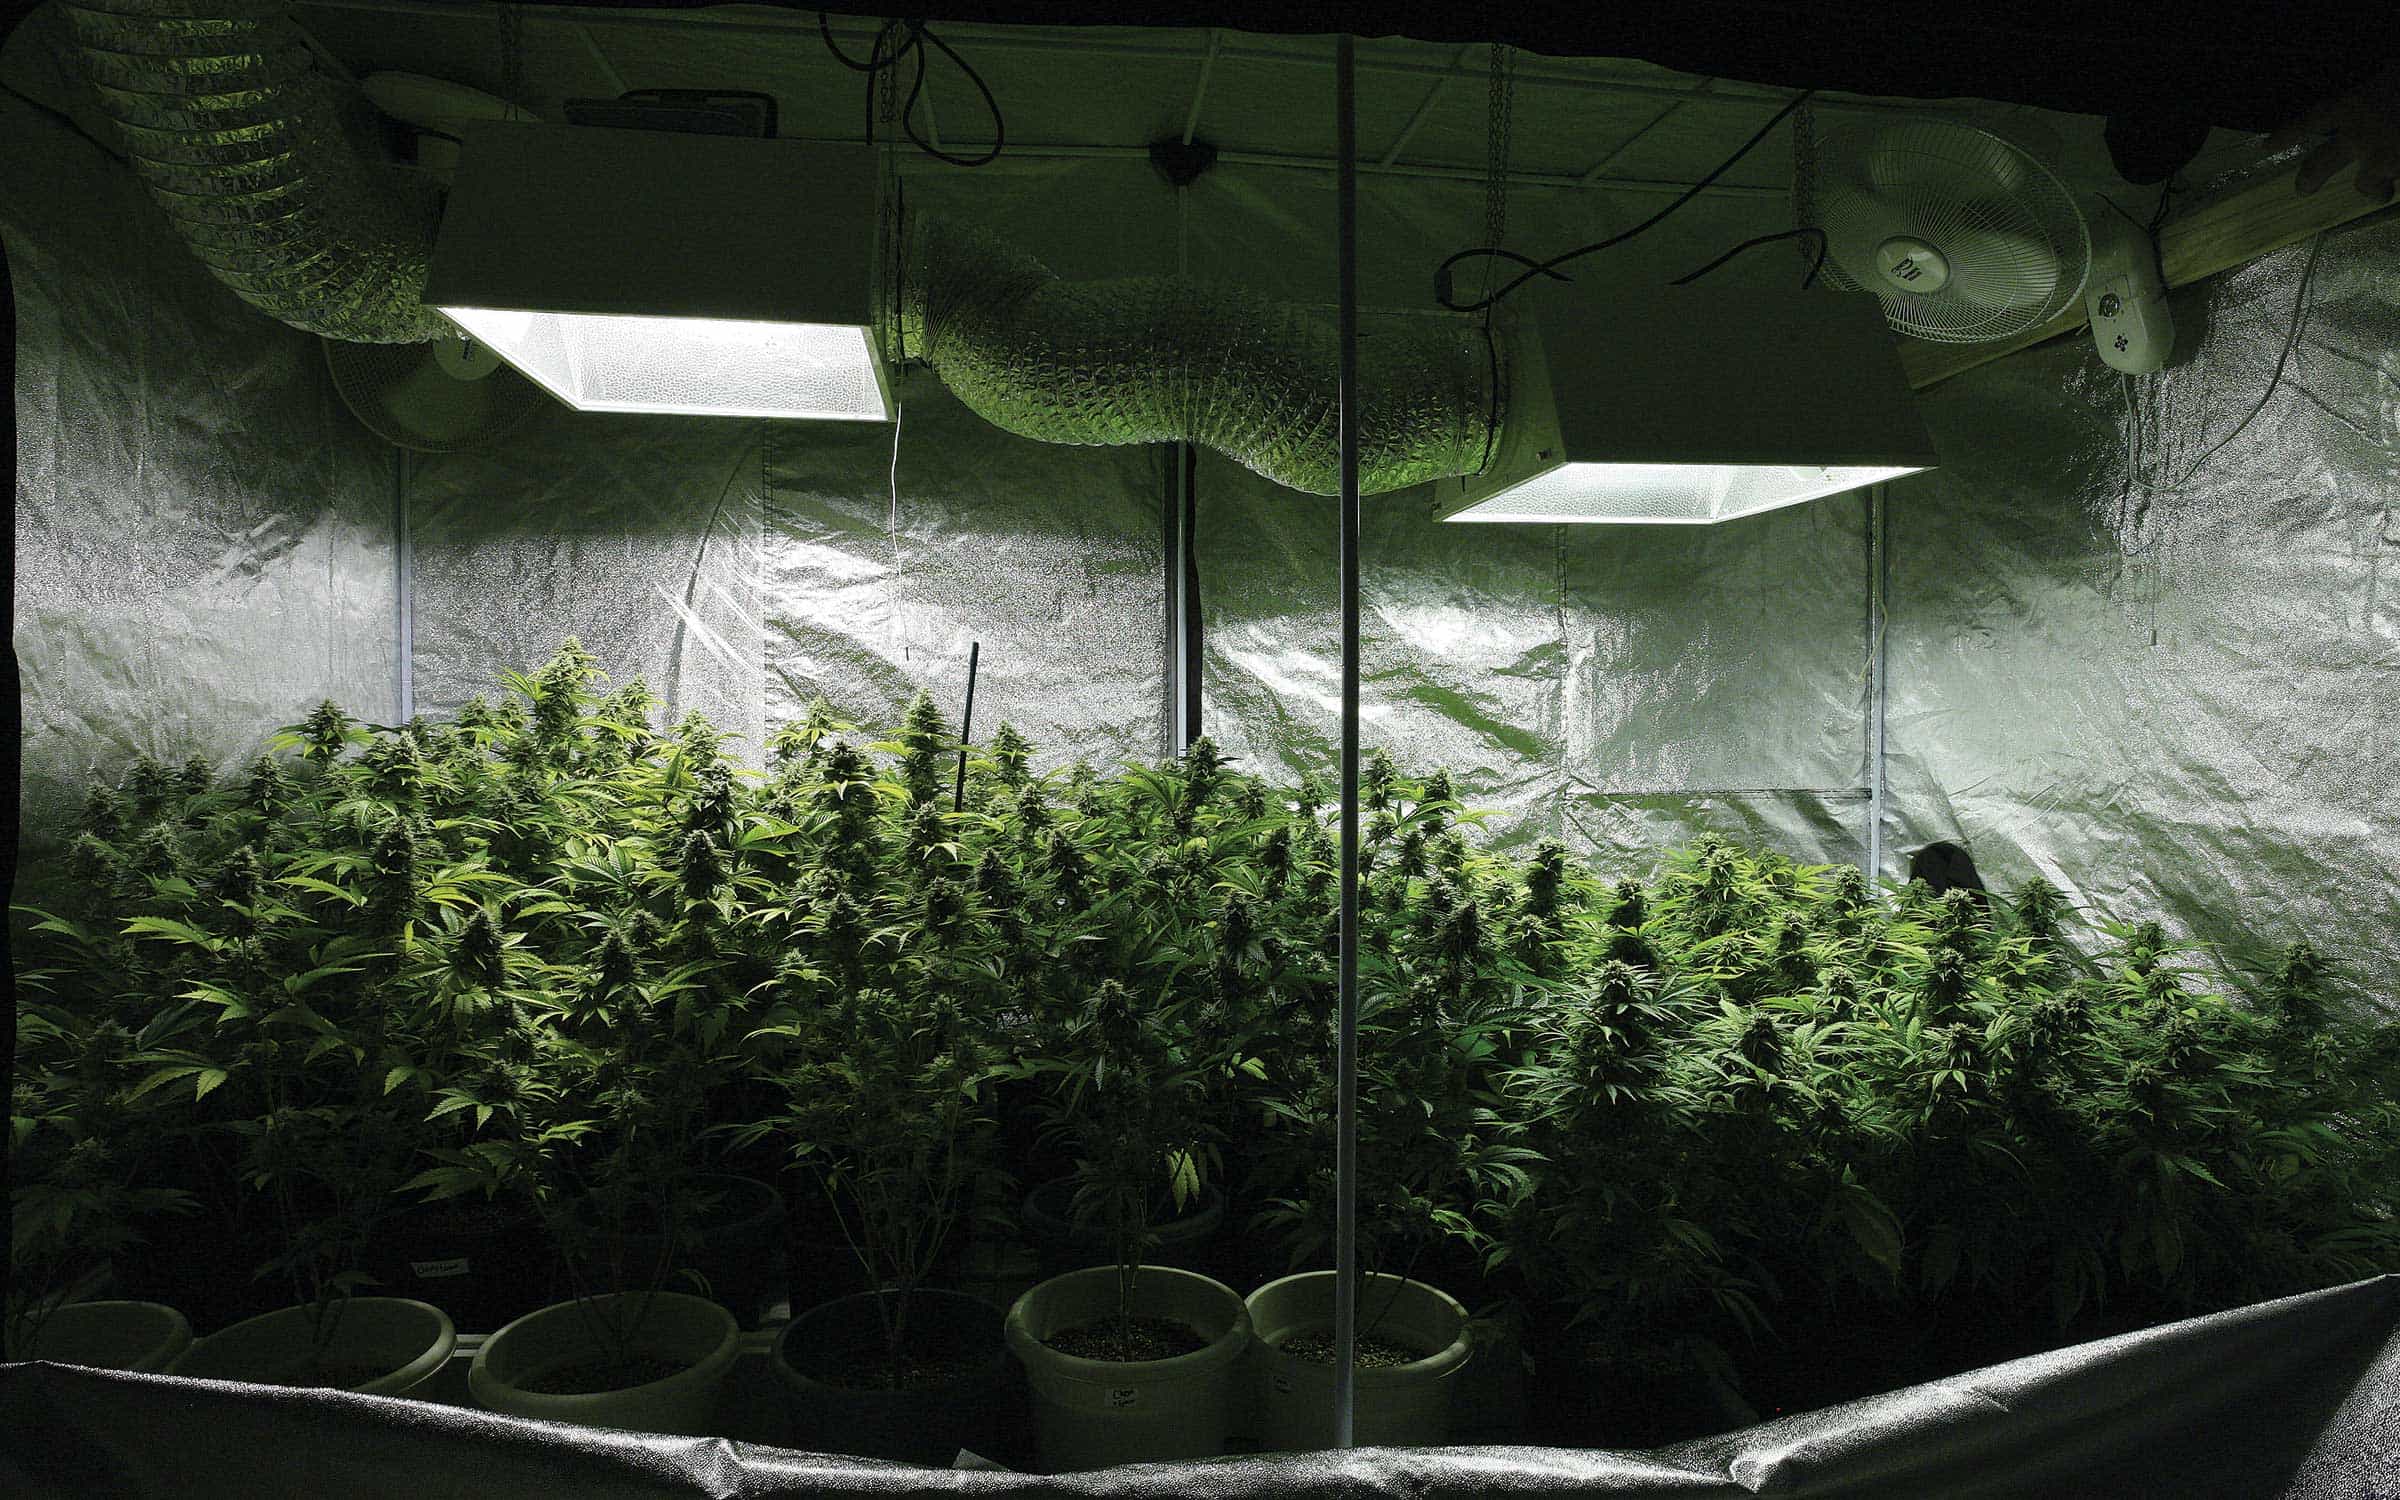
A simple basement grow tent with two HPS lamps makes for an easy home garden. (Photo by Nico Escondido)
The most important aspect of the indoor garden will be the lighting used; most failed attempts are the direct result of growers cutting corners on their lamps. While it’s understandable to want to eliminate heat emissions and high power draws, gardens that don’t deploy high-intensity discharge (HID) lamps will pay for it with low yields and low potency. Metal halide (MH) lights are the norm for plants in the vegetative stage, while high-pressure sodium (HPS) lights are recommended for flowering plants.
Although compact fluorescents and LEDs are excellent sources of supplemental lighting for HID lamps—especially under the canopy or along the sides of the garden—there are few of these on the market today that can be used as stand-alone grow lights to take a garden to harvest. LEDs that are intended as solo lamps need to provide full-spectrum white light, but these usually cost quite a bit more than traditional HID lights, while also consuming just as much electricity. For small indoor gardens, a 250- or 400-watt HID light will do the job nicely.
Step 3: Choose Your Medium and Containers
Whether you’re growing indoors or out, the next step is deciding the type of medium you’ll cultivate your plants in, especially since the root zone is extremely important to a plant’s growth and development. Containers can be just as important, since the containers and medium work together to hold water and oxygen for the roots—two essential components for a happy, healthy garden.
Outdoor growers have the luxury of using actual dirt or topsoil, in addition to compost and soil amendments, for their gardens. Most outdoor growers take advantage of these options, while indoor growers are limited to the more sterile and inert grow mediums. In fact, indoor growers don’t use soil at all these days; instead, they use “soilless” mediums, which look and feel very similar to traditional topsoil, but are really peat-, sphagnum- or coco-based substrates. These mediums act just as regular soils would, offering excellent buffering for root systems and holding plenty of moisture and air for roots to absorb during the day.
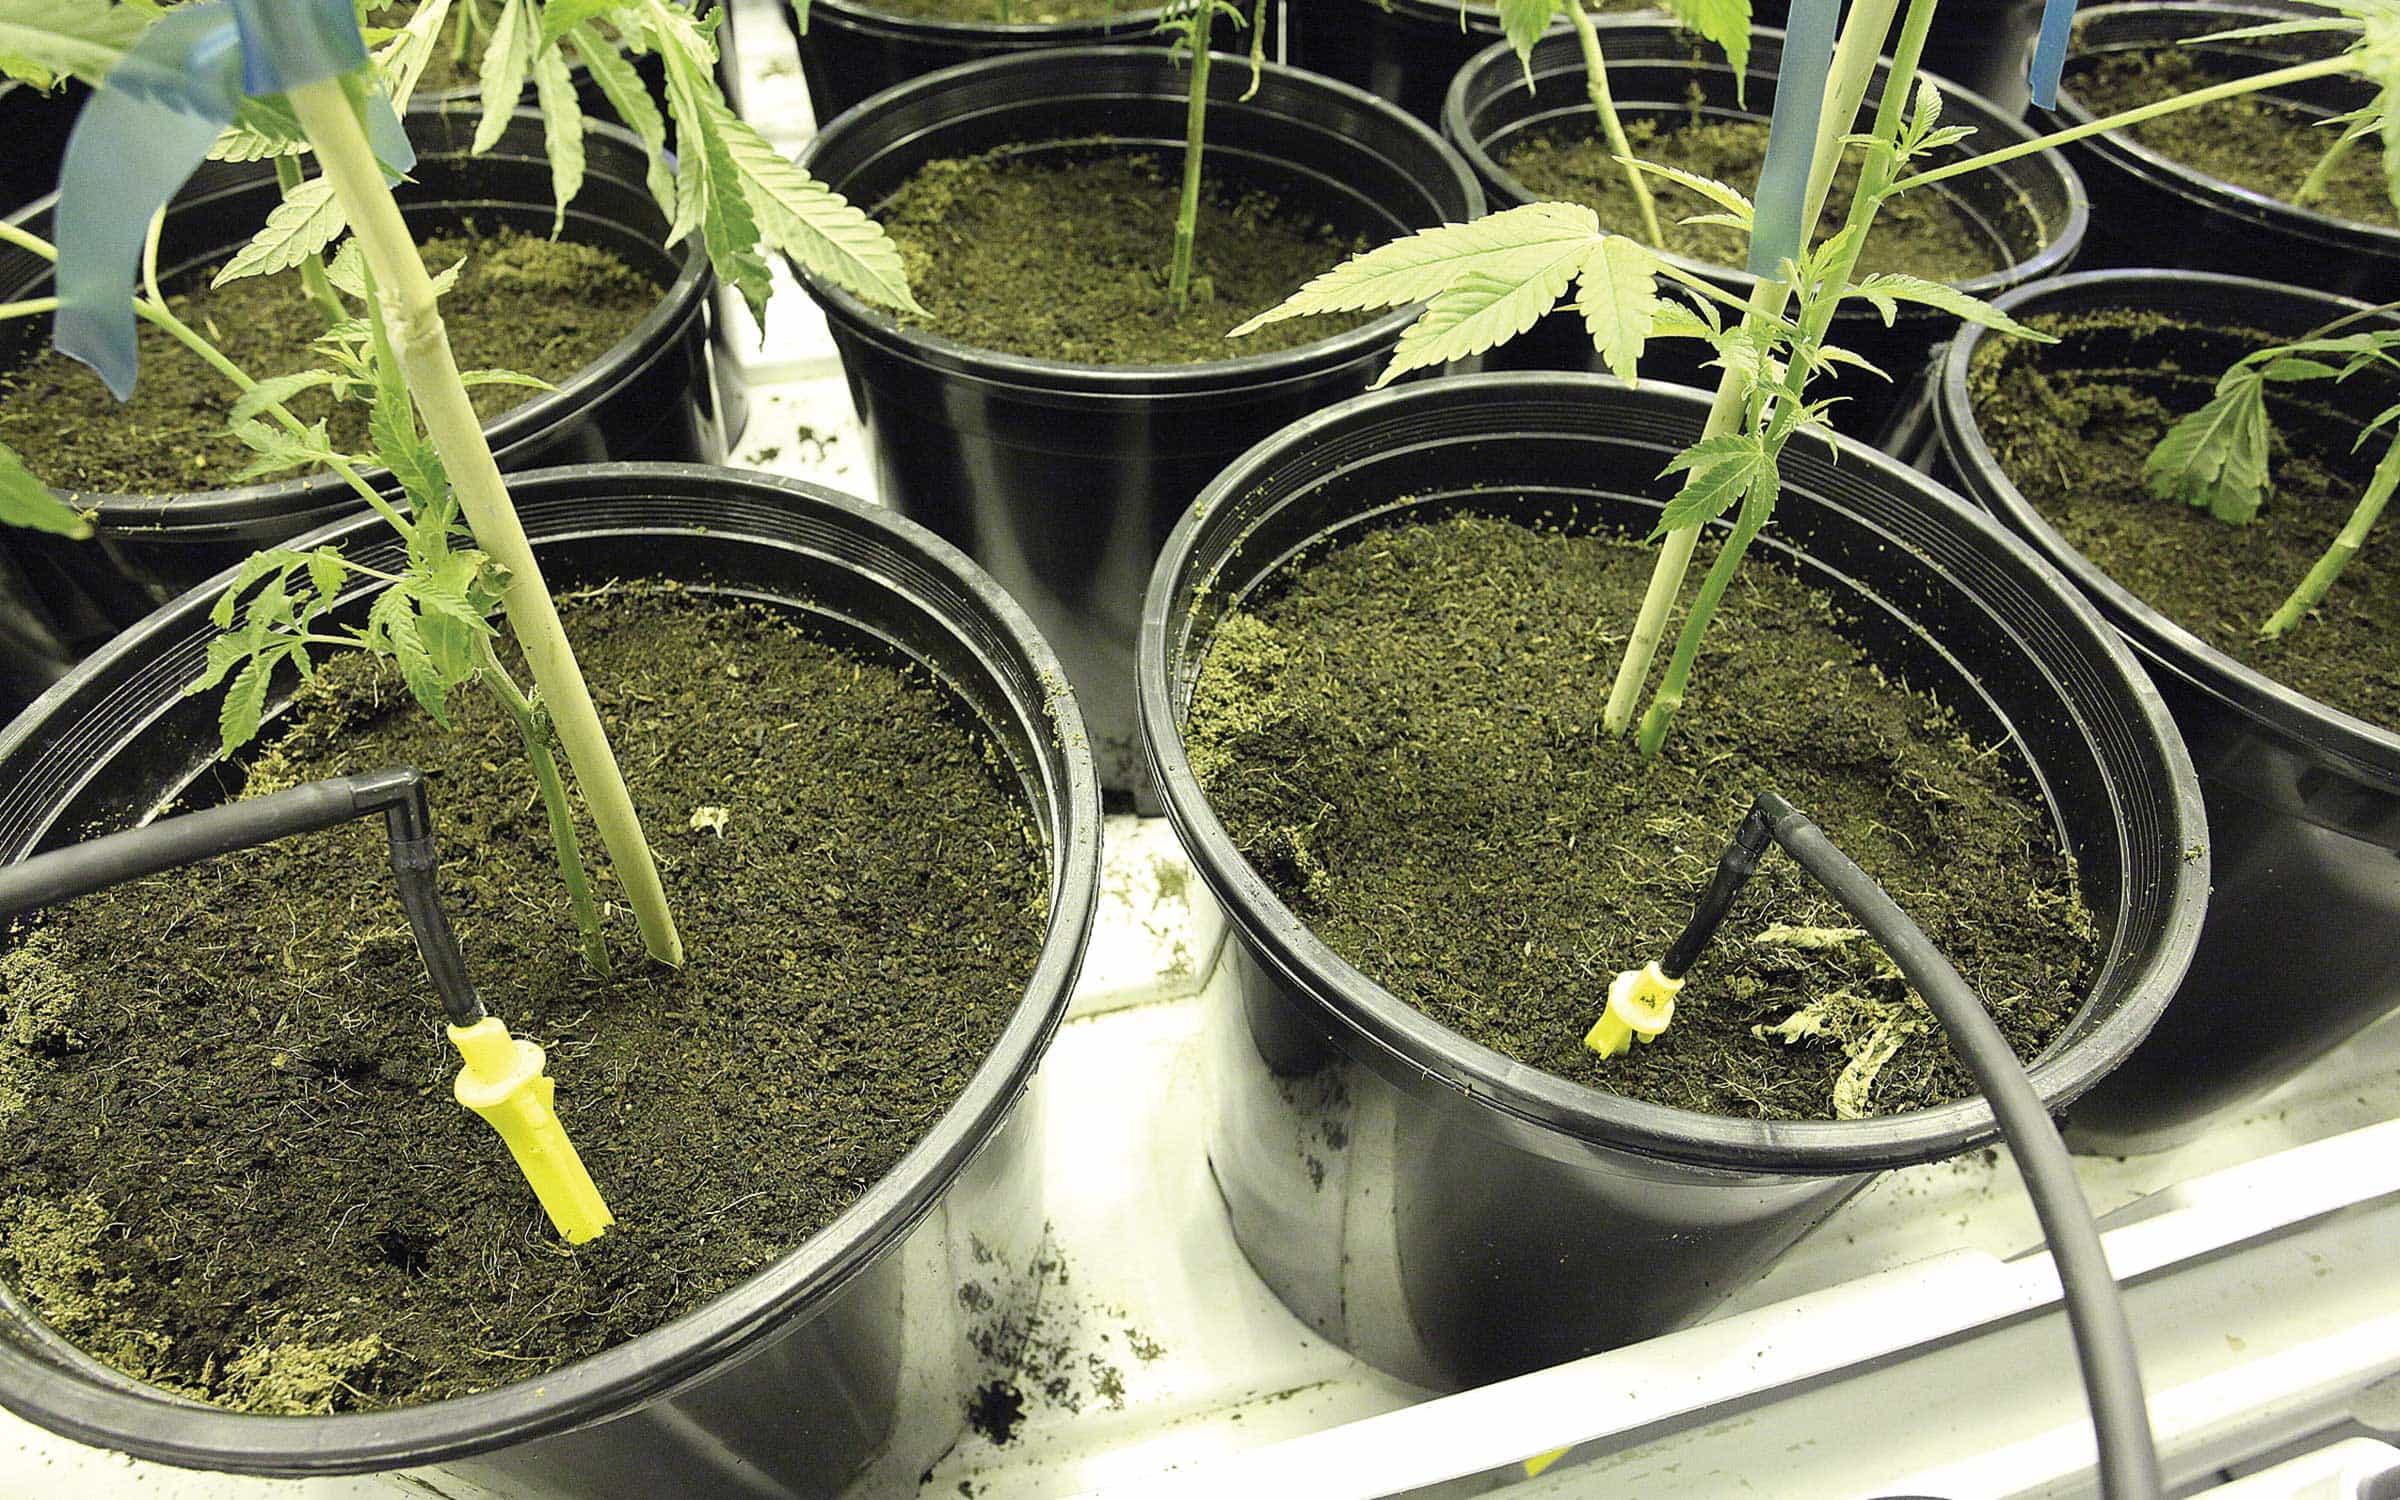
This coco-based soilless mix looks and feels like regular dirt but is better suited for indoor grows. (Photo by Nico Escondido)
“Smart” pots (with holes around the sides and bottom), or fabric pots made with cloth material, are fast becoming some of the most popular containers among indoor cultivators. These pots are extremely breathable, allowing air to permeate the root zone, which is important because the roots breathe in oxygen at night (while the rest of the plant breathes in CO2 during the day). They also offer ample drainage so that excess water doesn’t build up, compress the medium, and become stagnant at the bottom of the containers, which can contribute to root rot.
Step 4: Nutrients
Selecting the proper nutrients is an important consideration for any grow. Plants need the minerals found in nutrients to aid in photosynthesis and sugar production. But it’s important to remember that the nutrients we “feed” our plants aren’t the actual food they use for energy, but rather are part of a process that allows the plants to create their own food in the form of glucose.
Start by looking at the N-P-K (nitrogen/phosphorous/potassium) ratio listed on the nutrient products. Typically, nutrient lines consist of two parts, a “Grow” formula and a “Bloom” formula. Grow formulas contain more nitrogen, while Bloom formulas have N-P-K ratios higher in phosphorous and potassium. These ratios correspond to the plants’ needs during their vegetative and flowering stages of growth.
New growers are often reminded to start slow and low when dosing their gardens with nutrients, because it’s far worse to overfeed your plants than it is to underfeed them. Read the labels carefully and then mix a milder nutrient solution at one-half to two-thirds of the recommended dose. After a week to 10 days, if you see signs of discoloration or general deficiencies, you can increase the dose to the recommended levels. But if your plants are looking strong and healthy, you will have saved some money on nutrients and also avoided one of the biggest mistakes encountered by first-time growers. Remember, overfeeding can lead to nutrient burn in the root zone or, even worse, a buildup of excess salts in the medium, which can cause nutrient lockup, blocking the roots from absorbing the necessary minerals for important biological processes like photosynthesis.
Another way to avoid excess salts is to use organic fertilizers, compost teas or veganic nutrients. Organic and veganic nutes may be a bit more expensive than their synthetic counterparts, but they’re not salt-based and are easier for your plants to break down and absorb at the root level. Data collected and analyzed over the past five years at the various High Times Cannabis Cups show that organic and veganic lines go further than synthetic nutes in unlocking the maximum genetic potential of cannabis strains in terms of their cannabinoid and terpene production.
Many outdoor growers choose not to feed their gardens directly, but rather use a composted medium that comes loaded with the minerals that plants need for development and growth. Other outdoor growers who can’t tend to their gardens on a daily basis utilize time-release nutrients in pellet form that dissolve slowly and seep into the medium for uptake by the plants.
Step 5: The Vegetative Stage
The vegetative stage is crucial to a plant’s final success, especially where yields are concerned. In general, the longer a plant is kept in veg, the more it will develop, producing a greater yield at harvest time. The vegetative stage of a plant’s lifecycle usually lasts anywhere from two weeks to two months, depending on the grower’s preference (or the time of year it was planted, if the garden is outdoors).
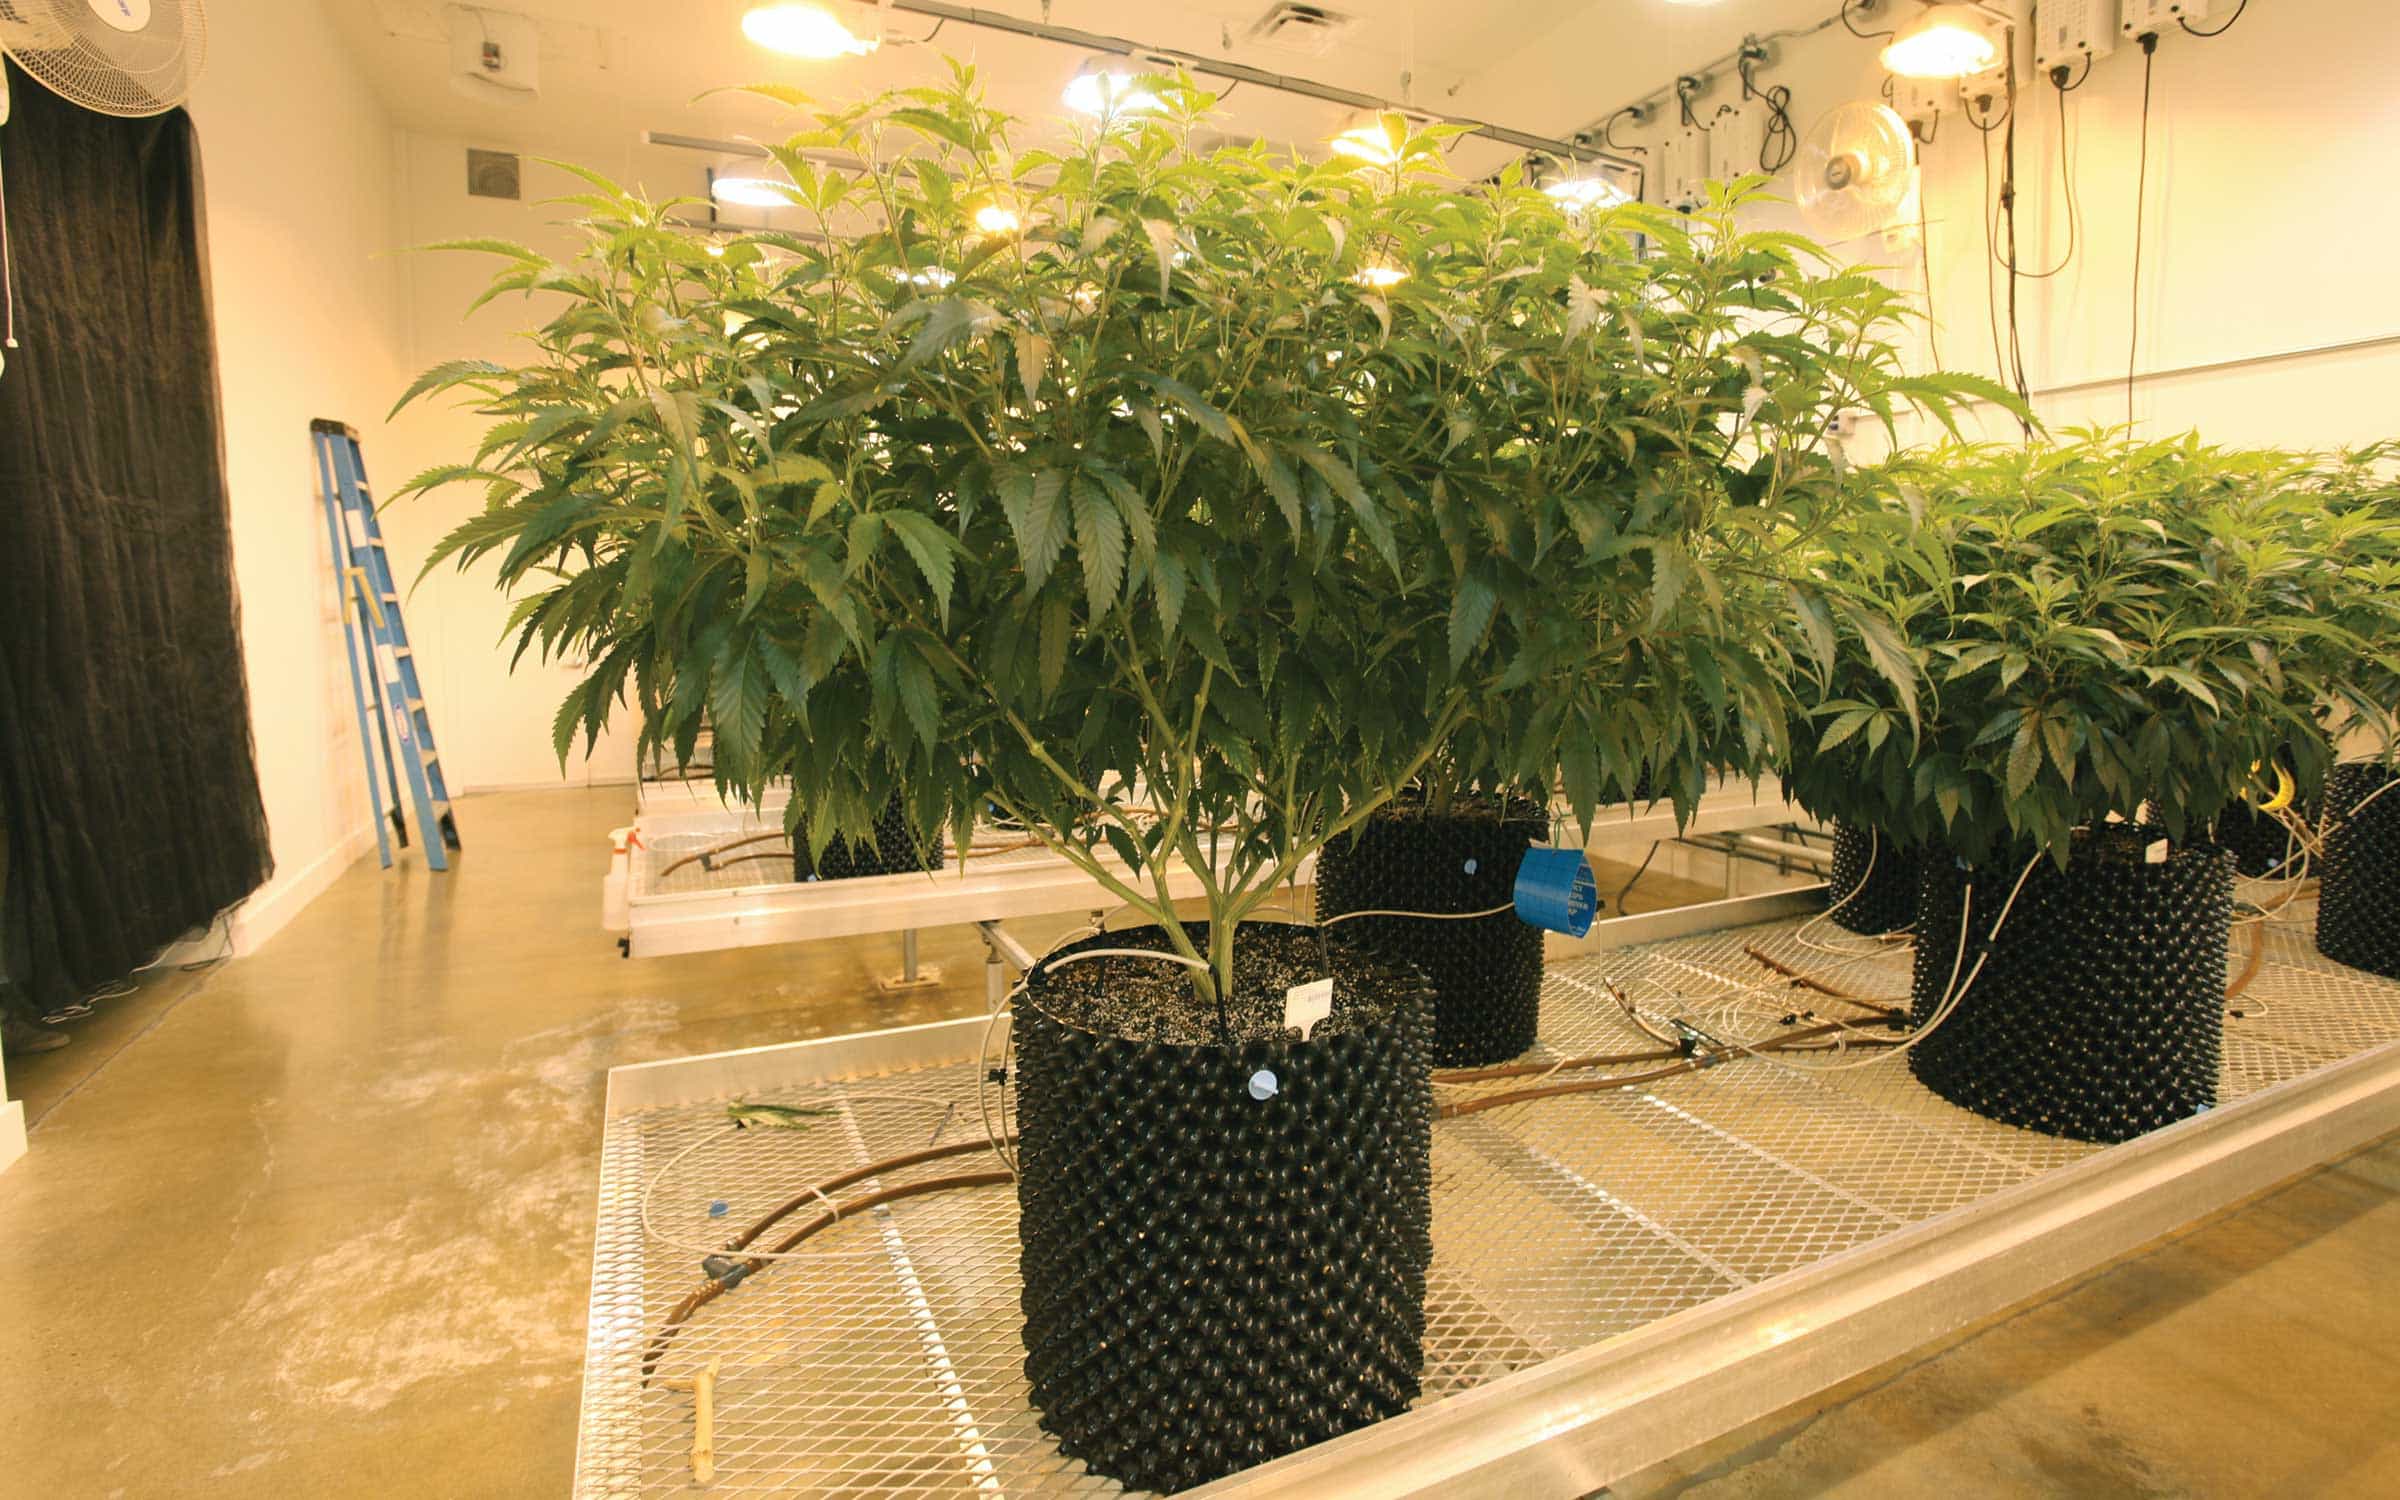
Vegging plants are topped early on to create bushy plants for both flowering and cloning. (Photo by Nico Escondido)
For plants to remain in the vegetative stage, they must receive more than 12 hours of light to keep them from flowering. Most indoor growers will keep plants under a minimum of 18 hours of light per day during the veg cycle. However, since the roots grow mostly during the dark cycle (or at night), allowing your plants some “down time” during veg is a good way to ensure vigorous development.
Growers utilize MH bulbs during the vegetative stage, since these lights are heavier in the blue wavelengths that help keep plants from stretching. This produces plants that are squatter and bushier, with shorter internodal lengths (the distance between branches on the main stem). This in turn helps save space indoors, but it also produces more budding sites, which typically occur at the nodes where the branches meet the stem, thereby helping to increase yields as well.
The vegetative stage is also important when it comes to training and pruning your plants. Smart pruning techniques, such as “topping” or “pinching off,” entail removing the top terminal shoot of the main stalk toward the end of the veg cycle. This causes the plant to release growth hormones that result in added shoots growing out from directly under the place where the terminal shoot was removed. These new shoots at the top of the plant can become large colas during the flowering stage.
Indoor and outdoor growers alike can use these techniques in conjunction with a trellis system, which opens up the garden to better light penetration and helps to induce longer branching with more nodal sites for flower production. A trellis system is also an excellent support structure for plants once they begin to produce heavy buds, but the trellis needs to be placed over the plants—and their growing shoots trained into its open spaces—early in the vegetative stage.
Step 6: The Flowering Stage
The flowering stage of cannabis plants occurs when the photoperiod (or light cycle) of the garden drops to 12 hours or less. In nature, outdoor gardens will begin to flower after the summer solstice, usually around July (depending on latitude), when the sunlight falls below this 12-hour threshold. Indoor growers set their lights on a timer using a 12-hours-on/12-hours-off cycle. Most cannabis strains flower after 56 to 65 days (eight to nine weeks). Sativas generally take longer than indicas, but since the majority of today’s cannabis varieties are hybrids, this can vary greatly from strain to strain.
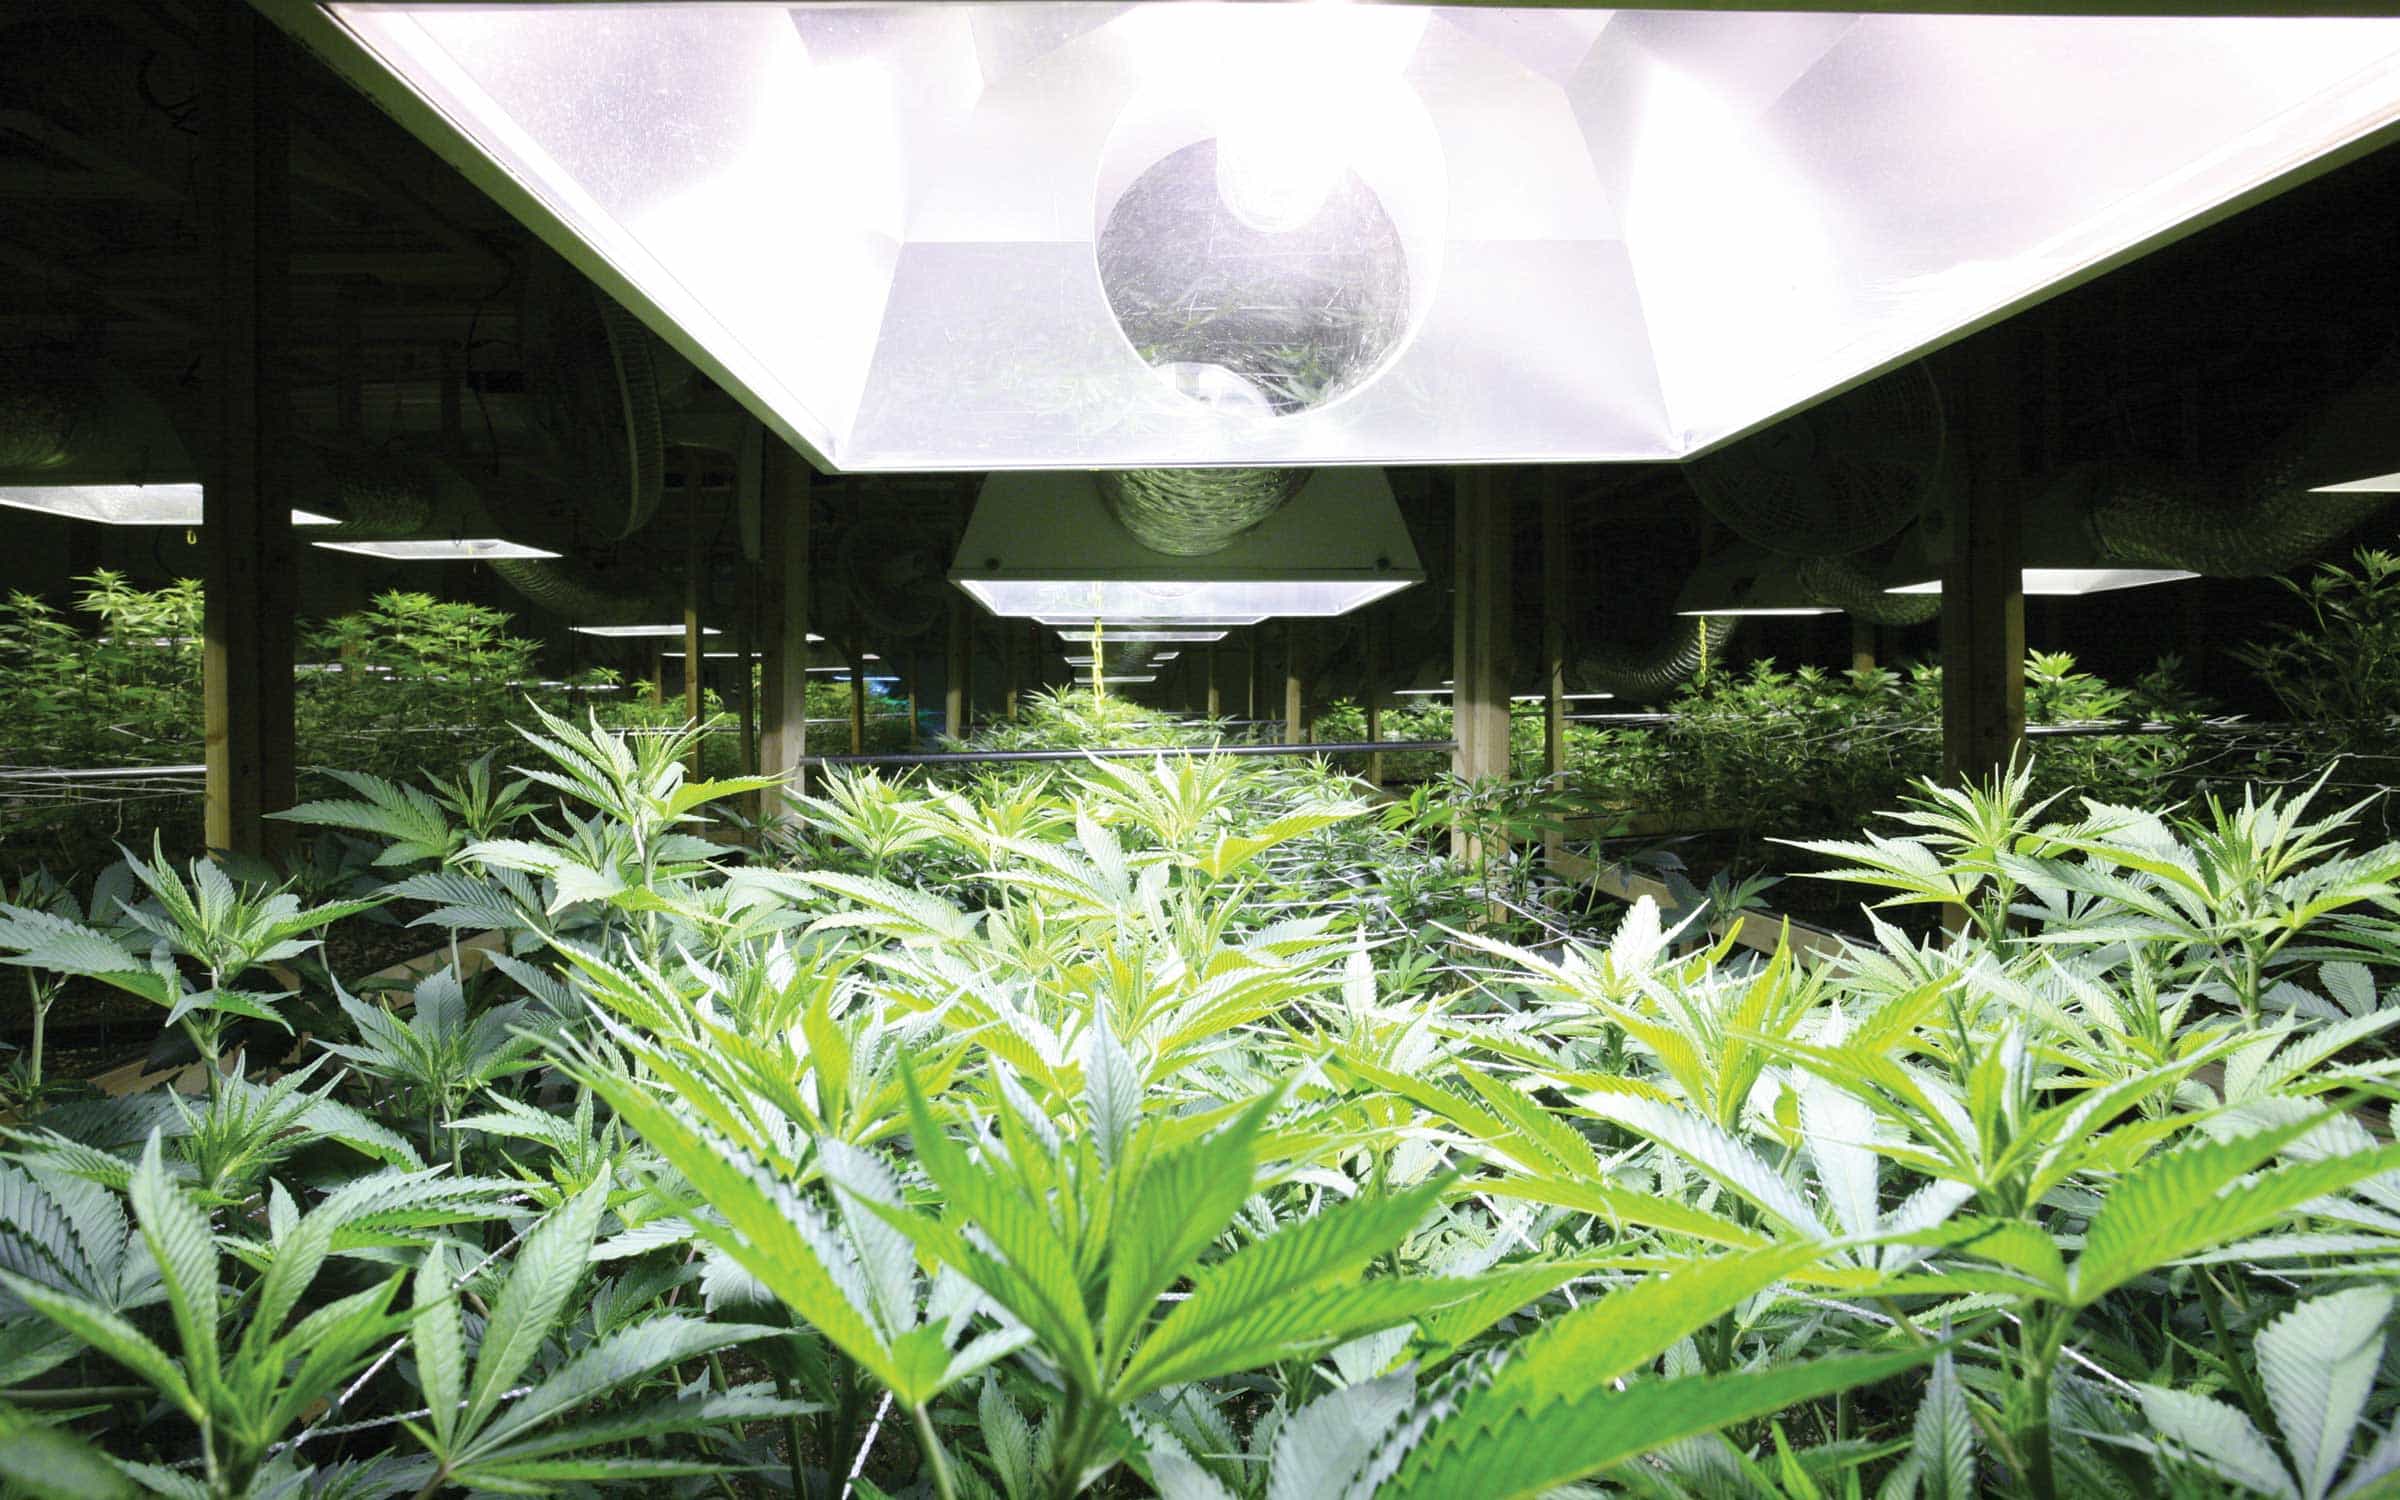
These plants were just moved under HPS lights (12 hours on) to trigger the flowering phase. (Photo by Nico Escondido)
As a general rule, a cannabis plant will grow another 30 to 50 percent of its final size in the flowering stage. Growers typically use HPS bulbs during this period, as these lights emit a spectrum heavier in the red wavelengths to more closely mimic the autumn sun, helping to spur faster flowering (and finishing) times. However, these red wavelengths can also cause plants to stretch a bit. Thus, savvy indoor growers will use a mix of MH and HPS lighting to provide a broader spectrum for their flowering plants, with the MH bulbs helping to curb stretching as well as providing added light energy, in the form of photons, to the garden. (Note: The shorter wavelengths, such as blue light, carry higher concentrations of photons.)
Diligent pruning in the flowering stage is very helpful toward increasing yields and potency. Removing deficient or necrotic leaves, especially larger, older growth, can help redirect the plant’s energy to the bud sites. Many leaves will begin to turn yellow toward the end of the flowering stage, which is normal and an indication of the dwindling amounts of nitrogen in the medium and plants. Nearly every Bloom formula has a lower level of nitrogen in its N-P-K ratio, as the plants need less of this mineral during flowering and more of phosphorous (P) and potassium (K).
Step 7: Flushing
Flushing the plants and the medium is an essential and underrated aspect of any grow. Whether you’re eating vegetables or smoking cannabis, the final product should be devoid of any residual minerals that will make the product harsh and unhealthy. This is especially important in the age of concentrates, where residual mineral deposits, pesticides and solvents can pile up to toxic levels for human consumption.
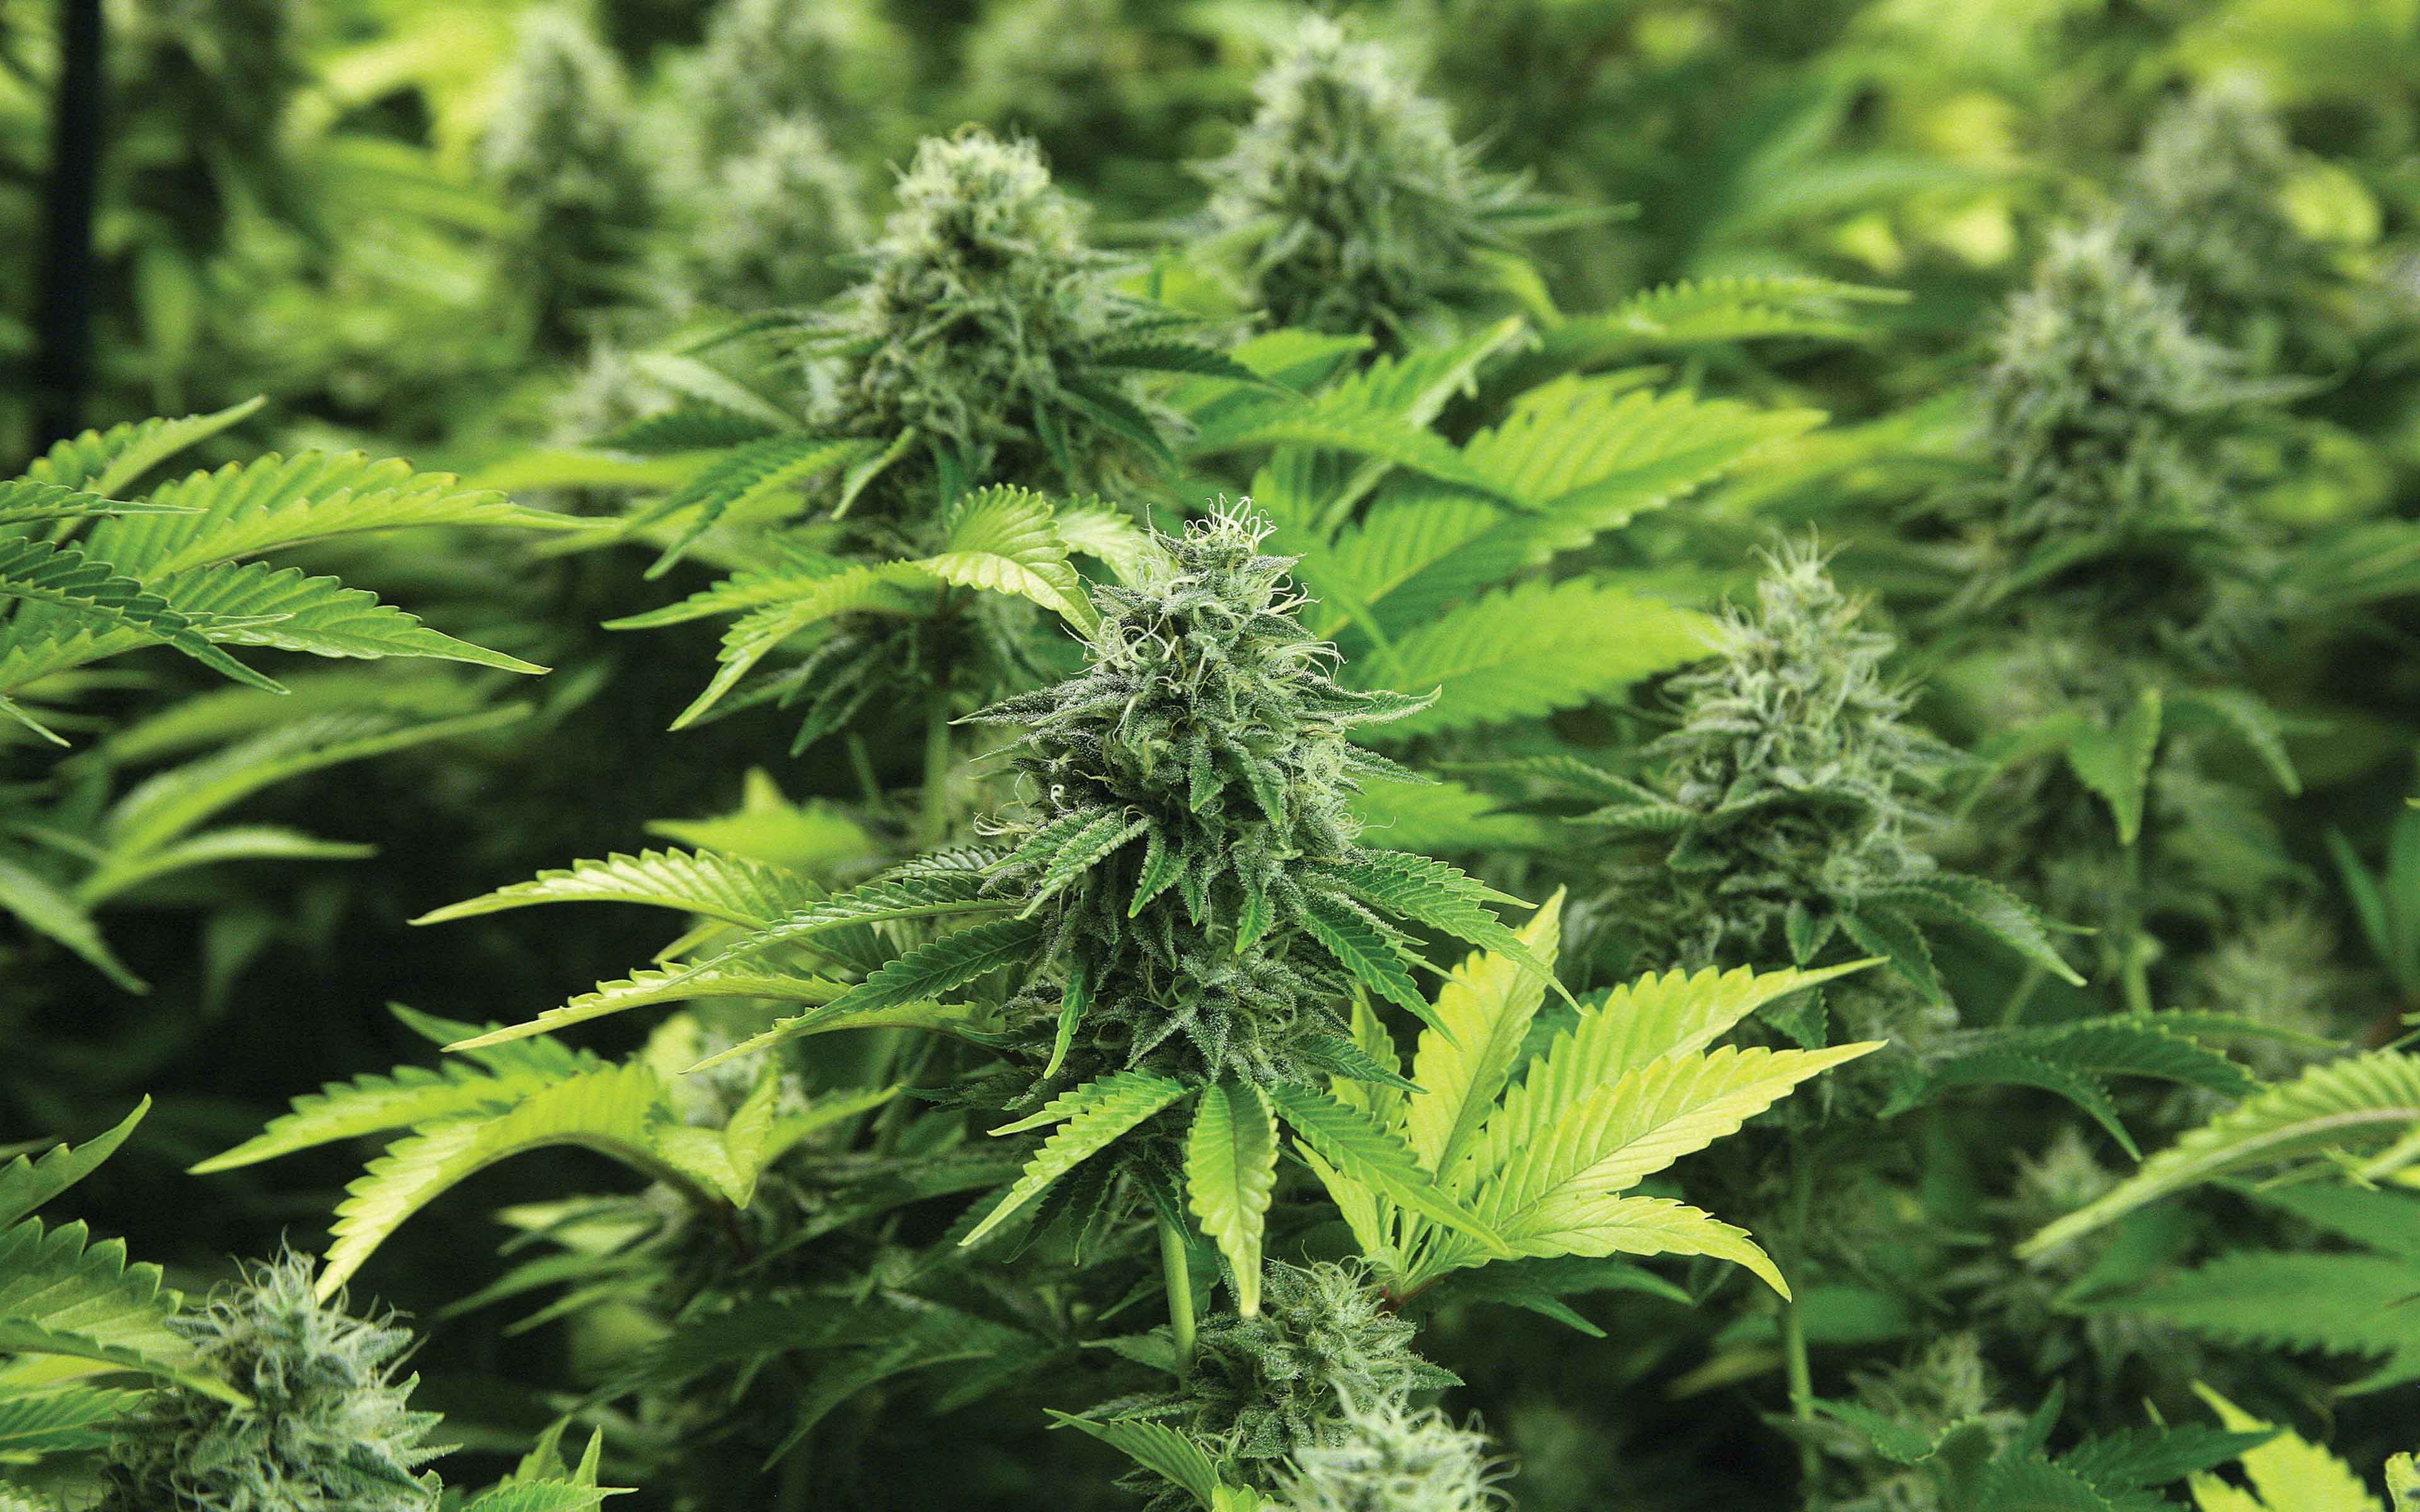
These buds are 6.5 weeks into flowering with leaves starting to yellow due to flushing. (Photo by Nico Escondido)
Most advanced growers will do a minimum flush with fresh water only for the entire final week of the flowering stage. Some growers prefer longer flushes of up to two weeks. During the flushing period, leaves will become extremely yellow and discolored as nutrients are leached from the plant. This will make for a smoother smoke, with the cannabis burning to a clean, white ash rather than a black, tar-like ball.
Step 8: Cutting and Drying
You’ve finally made it: harvest time! The reward for all your hard work is close at hand—but don’t rush it now. There are many acceptable methods for cutting down cannabis plants and drying the flowers. In general, the basic rule of thumb dictates that growers cut down their plants at the end of the daily dark cycle, just as the lights are coming on or the sun is rising. This allows the plants to be harvested in a dormant state, before they begin physiological processes like photosynthesis, which will draw moisture and minerals back up into the plant from the root system.
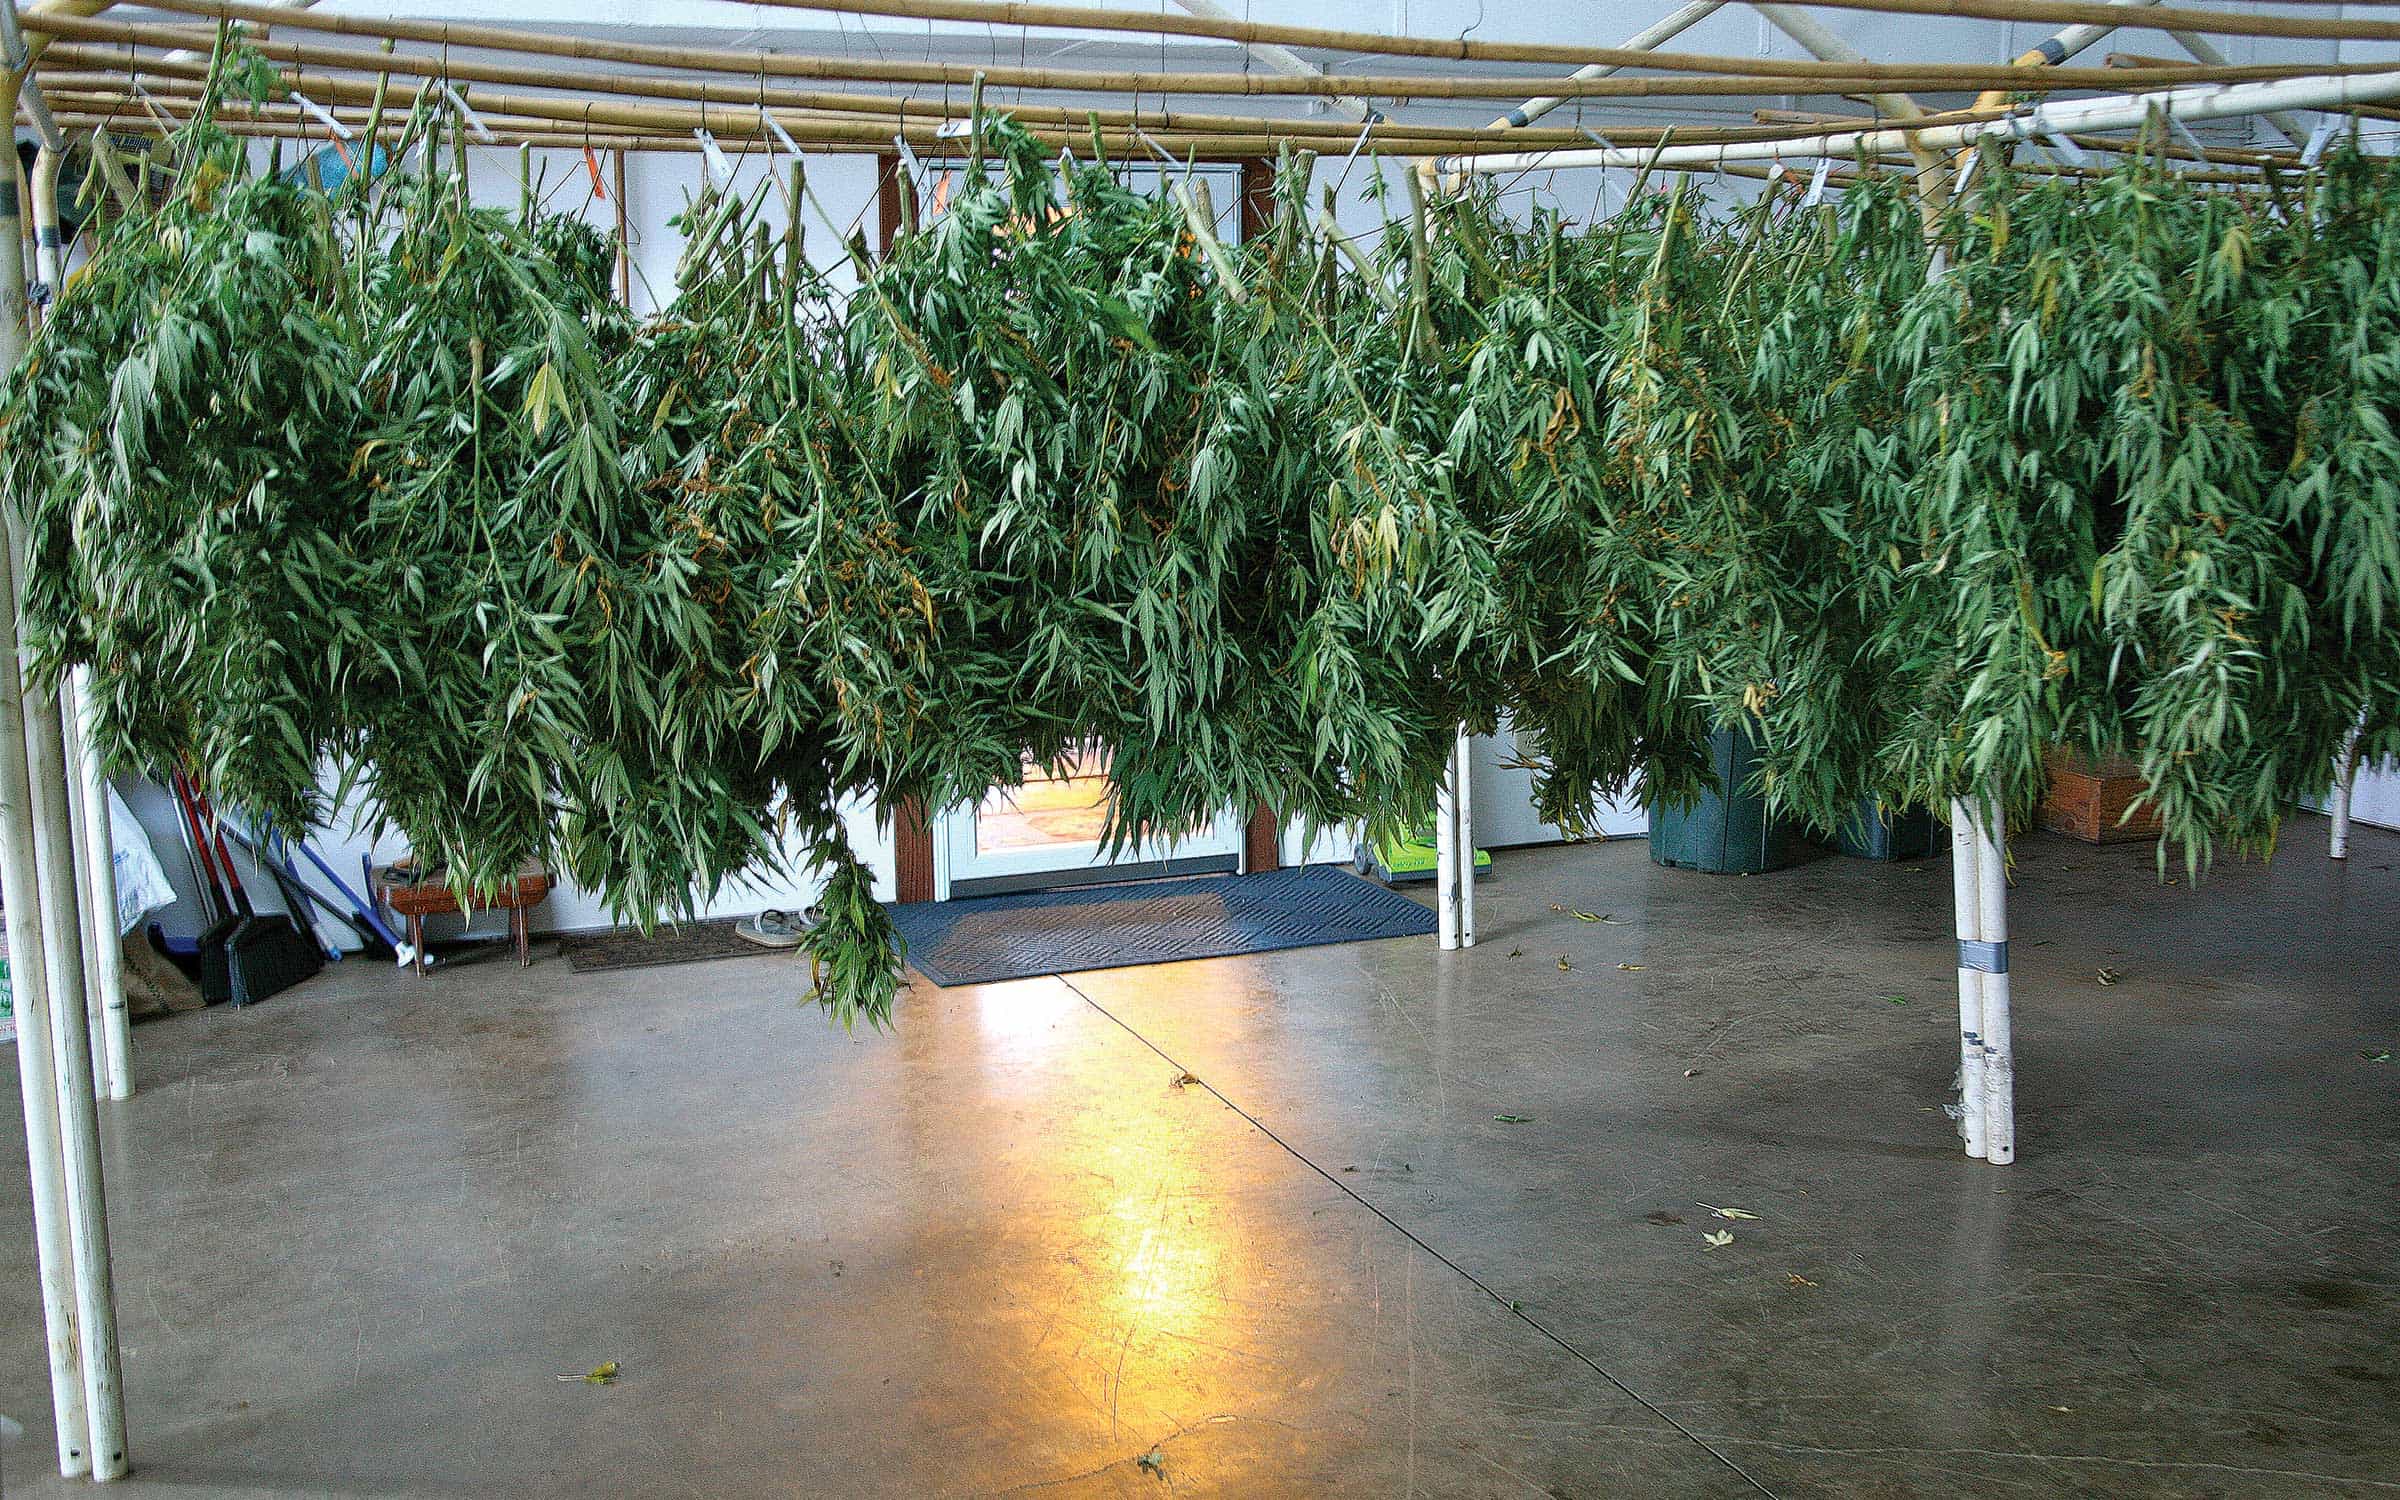
These cut branches from outdoor plants are hung in a dark, dry(Photo by Nico Escondido
Rather than cutting a plant at its base, one popular technique is to remove the individual branches starting at the top of the plant. For this method, the branches are cut just before the first shoot on each branch, thereby creating a convenient “V” notch near the base from which it can be hung upside down on a line or hanger. Be sure to label each branch with the strain name and plant number so as to avoid any confusion further down the line (such as during the trimming or curing).
Once they’re cut, hang the branches upside down in a dark, dry place for five to seven days. Be sure that plenty of air is being circulated around the flowers using floor and wall fans. Use a hygrometer to check the room’s humidity, and deploy dehumidifiers if the humidity in the drying room rises above 50%. Remember that the flowers are 85% water, and you can expect the final dry weight of the buds to be about 15% of their wet weight when originally cut at harvest.
Step 9: Trimming and Curing
Perhaps the most overlooked step in terms of the quality of the final product is this one, particularly where curing is concerned. But before the curing starts, the buds must be trimmed and manicured. Large commercial operations sometimes deploy trim machines to aid in the workload; however, veteran growers know that the best method for manicuring flowers is to trim them by hand.
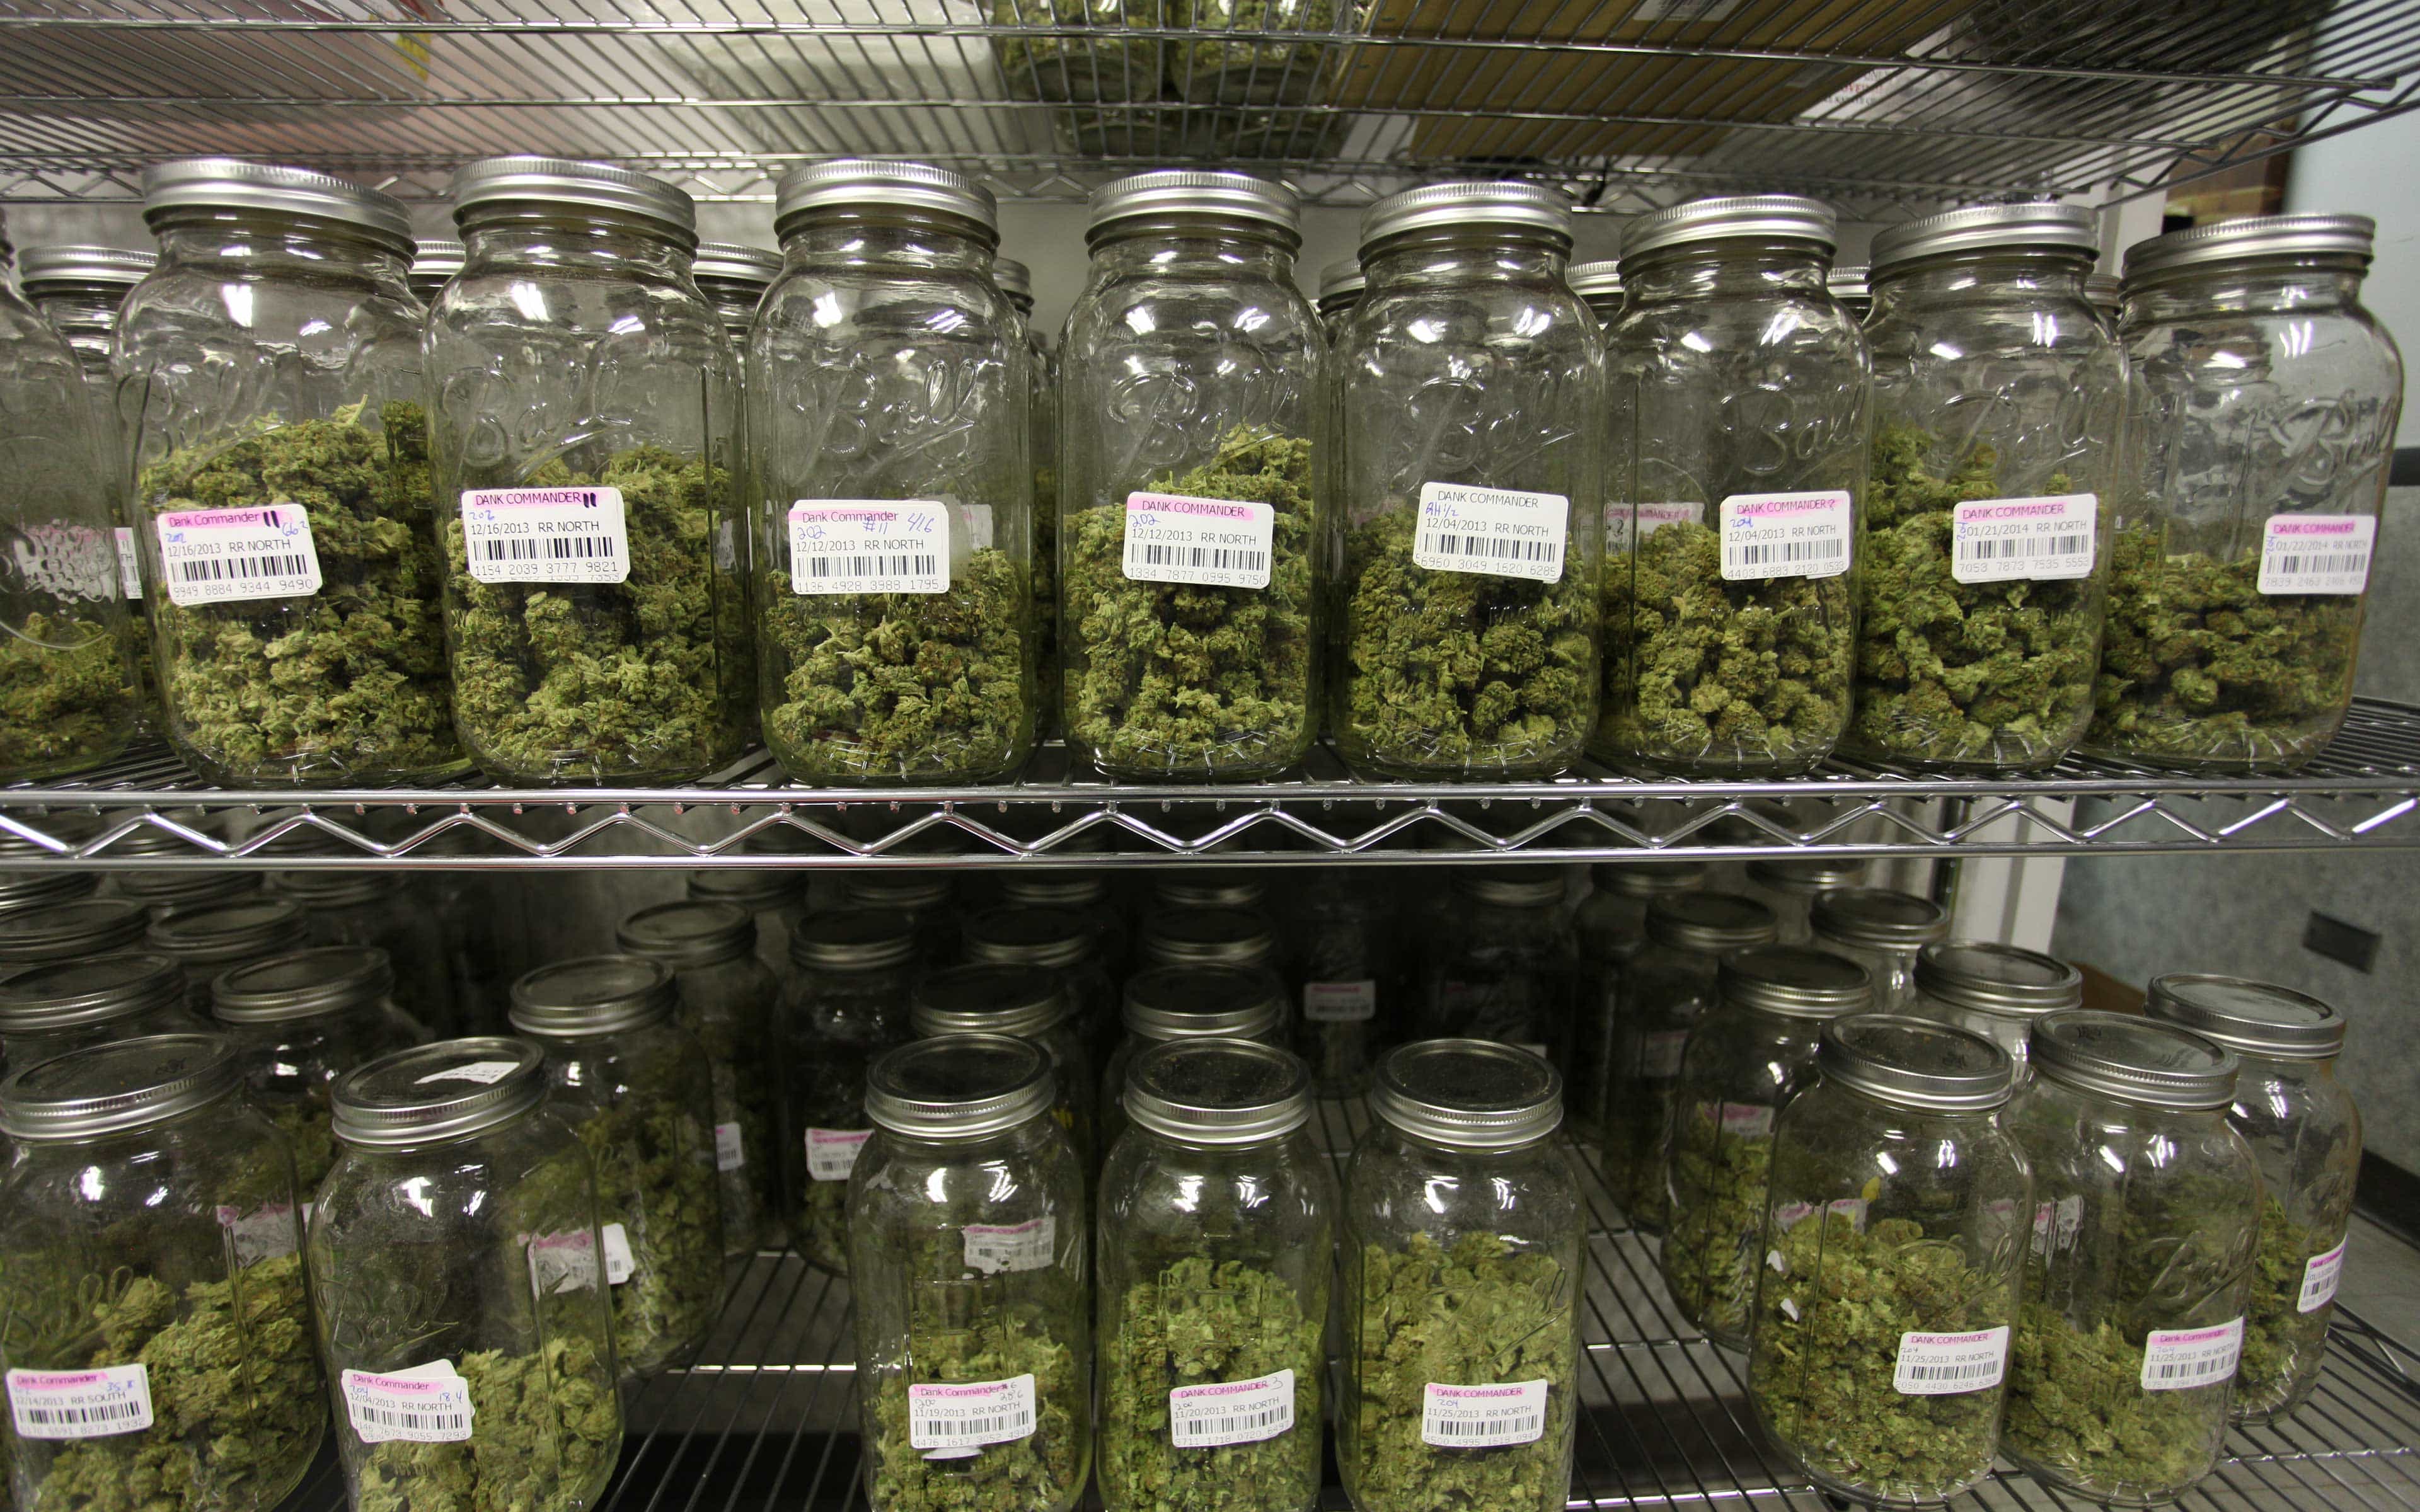
Buds curing in jars before being sold in a Colorado dispensary. (Photo by Nico Escondido)
There are competing opinions about whether it’s better to wet-trim or dry-trim. The latter occurs after drying, whereas the former occurs immediately following harvest, while the plant is still alive and “wet.” Some growers find it easier to dry-trim, when the leaves have less moisture and don’t stick to the buds as much. Conversely, other growers feel that trimming dry buds can knock off or damage the valuable trichomes. Either way, the buds need to be trimmed prior to the start of the curing process, and it might be more efficient for new growers to trim after drying so that the manicured flowers can go directly into the curing jars.
Sometimes growers are so excited (or relieved) after the harvest that they forget just how integral the curing of the buds is to their final quality. In short, curing is just a much slower drying process, which can last anywhere from a week to a month or two depending on the grower’s preference. Some connoisseurs prefer a longer and deeper cure to draw out the ultimate essence of the flower. Of course, there is always a point of diminishing returns after a certain length of time.
One of the best methods of curing consists of using UV-protected glass jars. The buds are placed in these jars and then kept in a cool, dry place out of direct light, with the jars being “burped” once or twice daily to allow the slowly evaporating moisture to escape. Leaving the jars open for five to 10 minutes at a time will do the trick nicely. Some people like to use larger jars, or bins, for curing larger amounts of flower. However, be wary of using plastic containers or bins for curing, as plastic can often impart an unwanted smell to your buds.
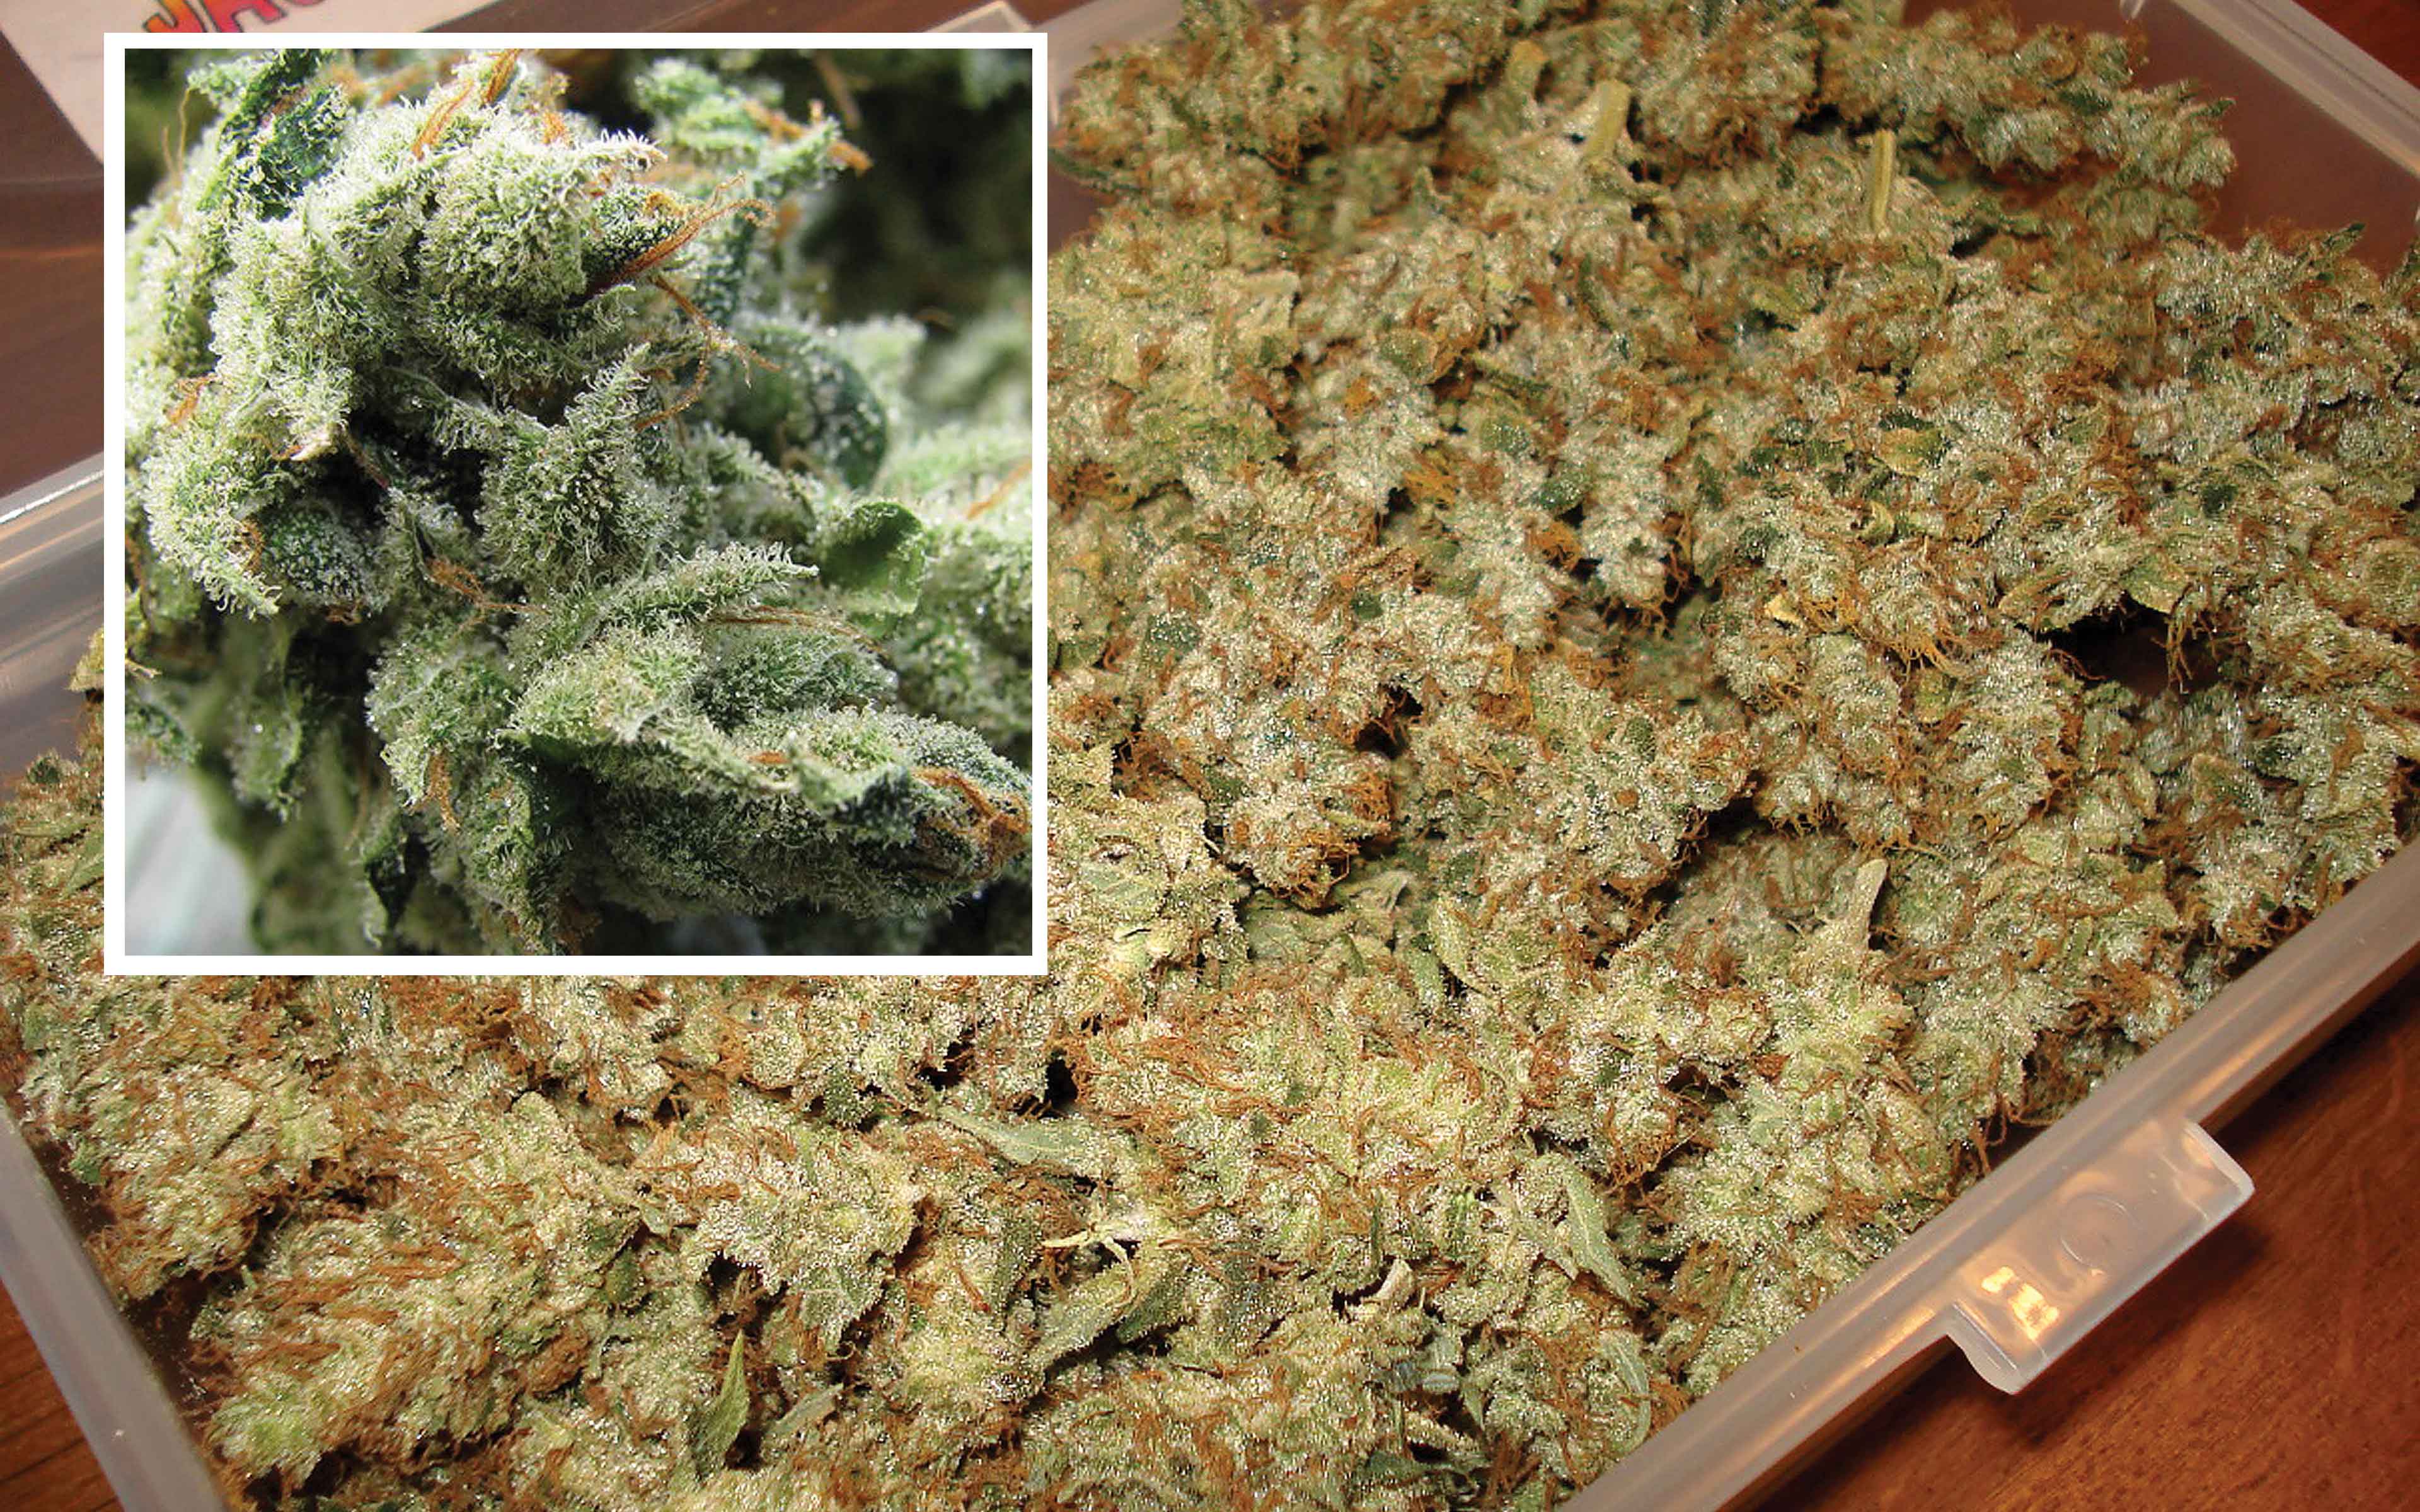
These flowers were trimmed to perfection with only buds and sugar leaves remaining. (Photo by Nico Escondido)
After about a week to 10 days, the buds should be dried and cured to a nearly pristine point. Each time you open the jars, you will smell more and more of the buds’ aromatic bouquet as the more volatile compounds—known as the terpene profile—begin to present themselves. Finally, once you—the grower!—know that the time is right, you can proceed to the final step…
Step 10: Smoke That Herb!
Congratulations! There is nothing in the world quite like smoking your own homegrown cannabis… and, hopefully, the process itself was a fun and rewarding experience.
Thanks for reading and celebrating our 500th issue of HIGH TIMES. And remember: Grow … and help the world grow, too!
Follow Nico on social media: @Nico_Escondido (Twitter) and @Nico_High_Times (Instagram).
Got questions? E-mail ’em to Nico at [email protected], and be sure to put “Nico’s Nuggets” in the subject line. (Tip: Before sending your question, try the new search feature on the High Times website. Simply click the magnifier icon at the top right and type “Nico + [your subject]” to see if your question has already been answered.)
RELATED: The Best Cannabis Dispensaries in America
Want more grow advice? Check out all of Nico’s Nuggets!

